System Settings
How to add the addons on Smart School?
Addons ManagementIn the Smart School Management System, there are 10 types of Addons available, which provide additional features to enhance the system's functionality.Smart School Thermal PrintSmart School Quick Fees CreateSmart School QR Code AttendanceSmart School CBSE ExaminationSmart School Two Factor AuthenticationSmart School MultibranchSmart School Behavior RecordSmart School Online CourseSmart School Gmeet Live ClassSmart School Zoom Live ClassTo get
Read MoreAbout ID Auto Generation
ID Auto Generation refers to the process of automatically creating a unique identifier for a record. This can be achieved using various methods, such as a database’s built-in auto-increment feature or by generating a random alphanumeric string. The purpose of an auto-generated ID is to ensure that each record has a unique identifier, making it easier to retrieve, track, and manage data.Student Admission No. Auto GenerationTo enable automatic generation of Student Admission Numbers,
Read MoreWhatsApp Settings
WhatsApp Settings – ExplanationThis setting allows the school to set up WhatsApp Quick Contact Buttons for different panels of Smart School. When enabled, users can quickly open WhatsApp chat with the school by clicking the WhatsApp icon.The settings are divided into three areas:Front Site WhatsApp SettingThis setting applies to the school website’s public/front page.WhatsApp Link (Toggle)Enabled → WhatsApp chat button will appear on the school’s front
Read MoreAbout System Settings
System Settings is used to manage your website settings such as current themes, custom fields, password etc. This module contain 20 sections – General Setting, Session Setting, Notification Setting, SMS Setting, Email Setting, Payment Methods, Print Header Footer, Front CMS Setting, Rules Permissions, Backup/ Restore, Language, Users, Modules, Custom Fields, System Fields, Student Profile Update, Online Admission, File Types, System Update to manage website.
Read MoreAbout ID Auto Generation
ID auto generation refers to the process of automatically creating a unique identifier for a piece of data or record. This can be done through various methods, such as using a database's built-in auto-incrementing feature, or by generating a random alphanumeric string. The purpose of an auto-generated ID is to ensure that each record in a database has a unique identifier, which can be used to easily retrieve and manage the data.Student Admission No. Auto GenerationTo set Student Admission
Read MoreHow to manage attendance type?
The Attendance module is designed to help teachers easily mark student attendance during class. It’s difficult for the teacher and the class to build their skills and progress if a large number of students are frequently absent. The biometric attendance device is used for only day wise attendance at Smart School and check in and check out by the students.Attendance module workflow: In smart school, we can use two types of attendance (Attendance and Biometric Attendance). You can run any
Read MoreHow to manage miscellaneous?
Online ExaminationShow Me Only My QuestionTo show only my questions, go to System Settings > General Settings. Under Miscellaneous, you will find the 'Show Only My Questions' setting. Enabled this setting allows a teacher to hide their own questions, preventing other teachers from seeing them.When 'Show Only My Questions' is disabled, other teachers can view these questions which you have added.Note - If the 'Show Only My Questions' option is enabled
Read MoreHow to manage maintenance?
For maintenance, go to System Setting > General Setting, then Maintenance. Here you can disabled or enabled maintenance mode. When you keep disabled the maintenance mode, student's can login their panel.When you Enabled maintenance mode and click the Save button.The student login page will no longer function, instead, it will display Site Under Maintenance.
Read MoreHow to manage fees settings?
Offline Bank Payment In Student PanelFor offline bank payment in the student panel, go to System Setting > General Setting, then Fees. Here you can Disabled or Enabled offline bank payment in the Student Panel.When you Enabled Offline Bank Payment In Student Panel permission, the Offline Bank Payment tab will appears in the student panel, allowing students to pay their fees by offline mode.When you Disabled Offline Bank Payment In Student Panel permission, the Offline Bank Payment tab will
Read MoreHow to manage student / guardian panel?
User Login OptionTo access the User Login Option for students and parents, go to System Settings > General Settings. Then, click on the student/guardian panel. Here, in first, you can see the user login option.By using user login option, you can manage both the student and parent logins. All you need to do is check or uncheck the box next to the student and parent options.If the student login checkbox is checked, the student will be able to log in to their panel, but if the parent login
Read MoreHow to Register Android Mobile App?
To register an android mobile app, go to System Setting > General Setting > Mobile App. For register mobile app click on Register Your Android App when you will click on it pop window of Register your Android App purchase code will be open, here enter Envato Market Purchase Code For Smart School Android App ( How To Find It? ) and Your Email Registered With Envato then click on Save button.Now enter User Mobile App API URL, User Mobile App Primary Colour Code and User Mobile App
Read MoreHow to manage backend theme?
To change the backend theme, go to System Settings > General Settings > Backend Theme. Here you can see the multiple theme option available as White, Default, Red, Blue and Gary theme, choose one of them then click on save button.You can keep your preferred backend theme for your smart school by clicking on the theme and it will show "enabled." After you click on the "Save" button, your backend theme has been successfully changed.
Read MoreHow to change login page background?
To change the background of the Admin Login Panel and User Login Panel, go to the side menu bar and select System Settings > General Settings; in the general settings, you can see the third option, "Login Page Background."In this feature, you can change the background of the login Admin Panel as well as the User Panel. You just need to click on the Update button for the login background image you want to change, and the admin or user login page background model will be opened. Now choose
Read MoreHow to Update Logo?
To Update logo go to System Setting > General Setting > Logo, here you can update Print Logo, Admin Logo, Admin Small Logo, App Logo.You can update your logo in Print Logo, Update by clicking on the "Update" button in the right below. The "Edit Logo" modal will open, and you can now select the image that you want to update. Your print logo will be updated.You can update your logo in Admin Logo Update by clicking on the "Update" button in the right below. The "Edit Logo" modal will
Read MoreHow to manage General Setting?
Go to the side menu bar and select System Settings > General Settings to view the various field settings such as General Setting, Academic Session, Date Time, Currency and File Upload Path.In General Setting field, you can set the school details such as School Name, School Code (Is your affiliation and accreditation no), Address, Phone, and Email. In Academic Session, you can see Session, and Session Start Month option. With the help of Session, (current running academic session for
Read MoreHow to manage Session Setting?
To manage school academics session you can add session from System Settings > Session Setting here enter Session and then click on Save button. You can view this added record in the Session List on the right side of the page.To edit session click on Edit icon and to delete session click on Delete icon present in the session list.Now to active school current session click on edit icon (show on mouseover) present at top of the left side menus.After click on it will open a pop up window where
Read MoreHow to manage Notification Setting?
To manage notification setting, go to System Setting > Notification Setting. There are 29 events like Student Admission, Exam Result, Fee Submission, Absent Attendance, Homework, Fees Reminder, Forget Password, Online Examination Publish Exam, Online Examination Publish Result, Zoom Live Classes, Zoom Live Meetings, Gmeet Live Meeting, Gmeet Live Classes, Gmeet Live Meeting Start, Gmeet Live Classes Start, Zoom Live Classes Start, Zoom Live Meetings Start, Online Admission Form Submission,
Read MoreHow to manage SMS Setting?
To manage SMS setting, go to System Settings > SMS Setting then select any SMS gateway from top of the page which you want to enable on your Smart School then enter Auth Key, Sender Id and select Status and then click on Save button.Here we are providing 11 SMS Gateway namely Clickatell SMS Gateway, Twilio SMS Gateway, MSG91, Text Local, SMS Country, Bulk SMS, Mobi Reach, Nexmo, AfricasTalking, SMS Egypt, Custom SMS Gateway in our Smart School.Custom SMS Gateway-In Smart School you can
Read MoreHow to manage Email Setting?
To send emails from Smart School, you need to configure Email Setting, for this go to System Settings > Email Setting. Currently Email is available for SendMail and SMTP delivery engine. If you want to send email through your Hosting Send Mail program then select SendMail email engine or to send email using any SMTP relay then Select SMTP email engine. You can use Gmail SMTP relay also by adding any Gmail account details but your Gmail account also seto for less secure device so SMTP engine
Read MoreHow to manage Payment Methods Gateway?
For allowing Students/parent to pay their payment online then you must have to enable any one of payment gateway, for this go to System Settings > Payment Methods then select any payment method from top of the page then enter your payment gateway account details in required fields then click on the Save button.Here we are providing 24 payment method Paypal, Stripe, PayU, CCAvenue, InstaMojo, Paystack, Razorpay, Paytm, Midtrans, Pesapal, Flutter Wave, IPay Africa, JazzCash, Billplz,
Read MoreHow to add Print Header Footer?
To add print header footer, go to System Settings > Print Header Footer then click on Fees Receipt (for students) present at top right corner in the print header footer page. Here you can replace your header image select Header Image and enter Footer Content and then click on Save button.To remove header image click on Remove button present in header image in right corner of the page on mouseover.To add print header footer payslip (for staff) click on Payslip present at top right corner in
Read MoreHow to manage Front CMS Setting?
To manage front CMS setting, go to System Settings > Front CMS Setting then Enable/ Disable Front CMS, Sidebar, Language RTL Text Mode fields and check Sidebar Option, upload Logo (369px X 76px), Favicon (32px X 32px) and then enter Footer Text, Google Analytics, WhatsApp URL, Facebook URL, Twitter URL, YouTube URL, Google URL, Linkedin URL, Instagram URL, Pinterest URL and select Current Theme (there are 3 default themes supplied with Smart School but you can create your own theme by
Read MoreHow to add Roles Permission?
A user's role determines what they can and cannot do in a site. Each role has a default set of permissions. We can assign different permission to different user according to their roles.To add roles, go to System Settings > Roles Permission then enter role Name and then click on Save button. You can view this added record in the Role List on the right side of the page.To delete role click on Delete icon present in the role list.To assign permission click on Assign Permission icon present in
Read MoreHow to manage Backup/ Restore process?
Backup and recovery describes the process of creating and storing copies of data that can be used to protect organizations against data loss. The purpose of the backup is to create a copy of data that can be recovered in the event of a primary data failure. Primary data failures can be the result of hardware or software failure, data corruption, or a human-caused event, such as a malicious attack (virus or malware), or accidental deletion of data.To create backup, go to System Settings >
Read MoreHow to manage language?
You can enable multiple languages and select your default language. To change language key phrases, go your language directory e.g. for English language go to the file /application/language/English/app_files/system_lang.php . Where as /application/language/English/form_validation_lang.php file is used for validation message text. Here we are providing 77 language in our Smart School -1. Afrikaans2. Albanian3. Amharic4. Arabic5. Azerbaijan6. Basque7. Bengali8. Bosnian9. Catalan10. Cebuano11.
Read MoreHow to enable/disable Users?
To check users (Student, Parent and Staff) of Smart School, go to System Settings > Users. All the users like Student, Parent and Staff can be see here and you can enable or disable them from login to User Panel. To enable or disable user click on toggle button in Action column.By default you will see student list. To enable/disable staff's , select Staff tab, to enable/disable student, select Student tab and to enable/disable parent select Parent tab from top of the page.
Read MoreHow to manage Modules?
To manage modules, go to System Settings > Modules here you can see all Enabled modules.if you disable any module from here then it will not be visible in Admin/ student/ parent panel at once it. To enable/disable, click on Toggle button present in Action column.System-Student-Parent-
Read MoreHow to add Custom Field?
To add custom field, go to System Setting > Custom Field then select Field Belongs To, Field Type, Field Name, Grid (Bootstrap Column e.g. 6) - Max is 12, Field Values (Separate By Comma) and check Validation, Visibility and then click on Save button. You can view this added record in the Custom Field List on the right side of the page.To edit custom field click on Edit icon and to delete custom field click on Delete icon present in the custom field list.
Read MoreHow to enable Captcha in Smart School?
The term Captcha stands for ‘Completely Automated Public Turing-test to tell Computers and Humans Apart’. Captcha is the random code generated in the form of an image to protect the web form submission automatically. Captcha ensures that the submission of the web form is done by a human not programmatically or the response from the client side is generated by a human.Here we are using text-based captcha. Text based captcha are usually known words or random combinations of letters
Read MoreHow to Disable System Field?
To disable system field, go to System Settings > System Field. Here you can see all enabled field. You can enable/disable any system field in student and staff.To disable system field, click on Toggle button present in Action column, at click of this button it will ask you to confirm, after your confirmation system field will be disabled and this will not be visible in the form.
Read MoreStudent Profile Update
This feature is used to allow student and parent to update student profile details. To grant rights to student and parent for student profile updates, Superadmin need to login in Smart School. After login go to System Settings > Student Profile Update and enable Allowed editable form fields and then click to Save button. If you do not want to allow any field to be updated in the student profile page, you can inactive it from Allowed Edit Form fields on student profile option, Inactive field
Read MoreHow to allowed File/Image type extension?
To manage File/Image type extension go to System Setting >> File Type, then enter Allowed Extension, Allowed MIME type and Upload Size for file and image and then click to Save button.
Read MoreHow to check System Update?
To check Smart School Version, login from superadmin panel and then go to System Settings > System Update link. Here you can see your current Smart School Version and also update to the newest version if available any.
Read More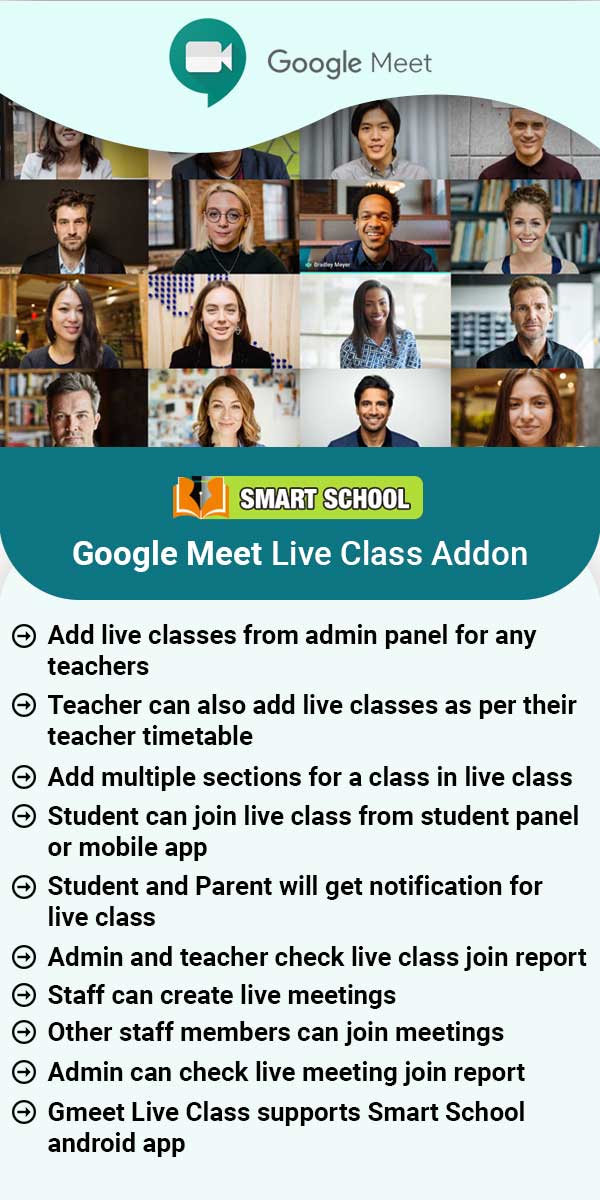
Latest Articles
- How to calulate the "Total Hours" Calculation in Biometric Attendance and QR Code Attendance for Student?
- How to calulate the "Total Hours" Calculation in Biometric Attendance and QR Code Attendance for staff/teacher?
- Version 5.0
- Version 8.0
- Version 7.0
- Version 4.0
- Version 4.0
- Version 4.0
- Version 2.0
- Version 2.0