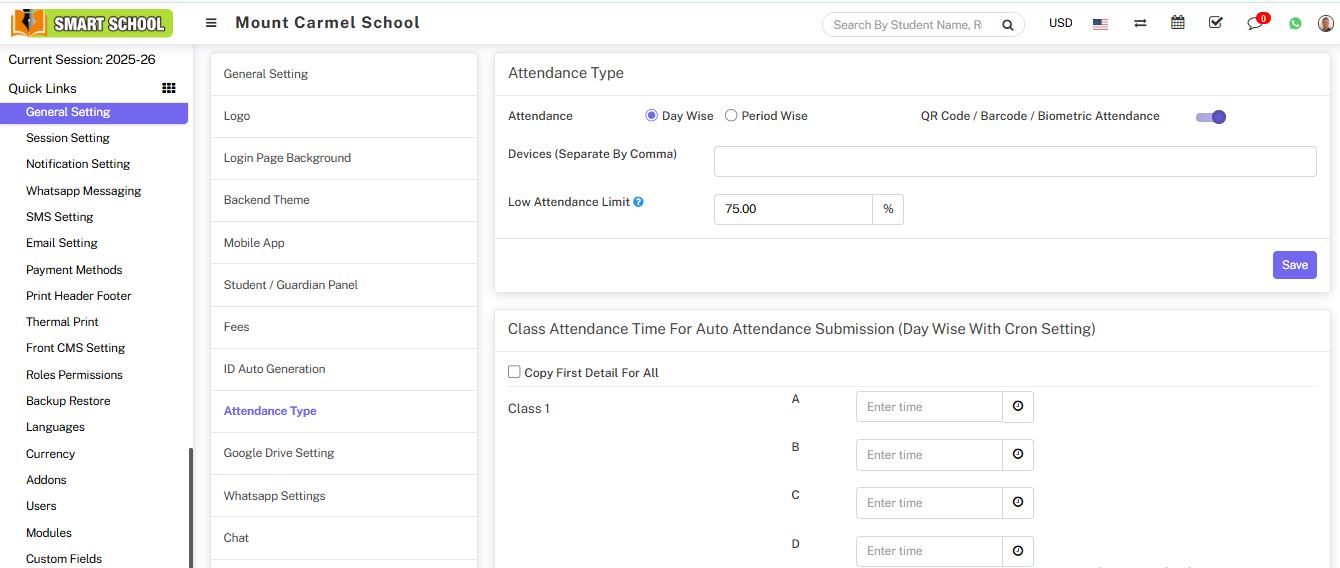
Attendance module workflow: In smart school, we can use two types of attendance (Attendance and Biometric Attendance). You can run any type at time attendance day wise and period wise and attendance type can be select from System Settings > General Settings. In Attendance Type here select the any one attendance type Day Wise or Period Wise and click on Save button.
In day wise attendance, just you need to go Attendance > Attendance By Date. Here, you have to select the class, section, and attendance by date, then click on the Search button. An attendance list of students will open below, and you can see the attendance of multiple students in that relevant class and section that you set.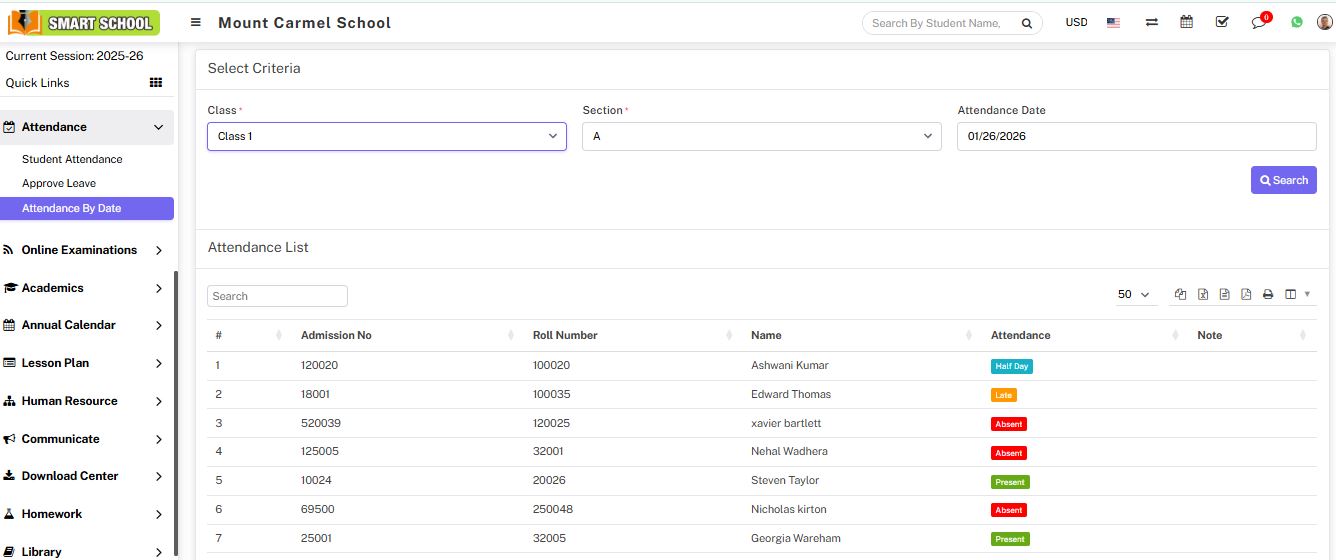
For period wise attendance go to System Setting > General Setting > Attendance Type. Click on the Period Wise checkbox then click on Save button.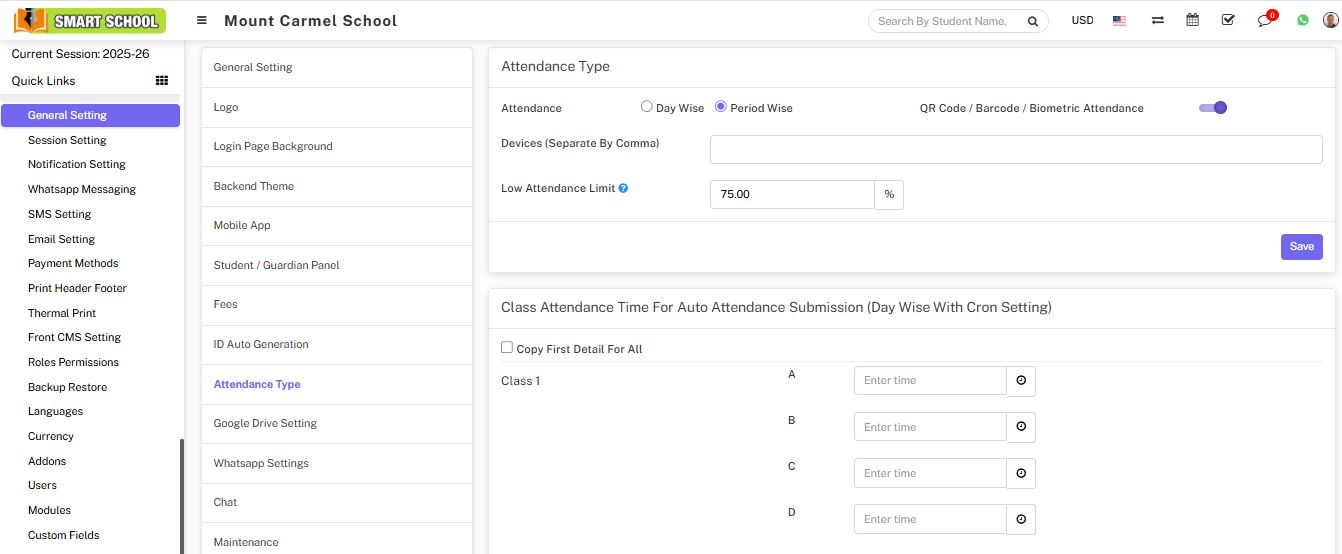
In period wise attendance, just you need to go attendance > period attendance by date. Here, you have to select the class, section, date and subject then click on the search button.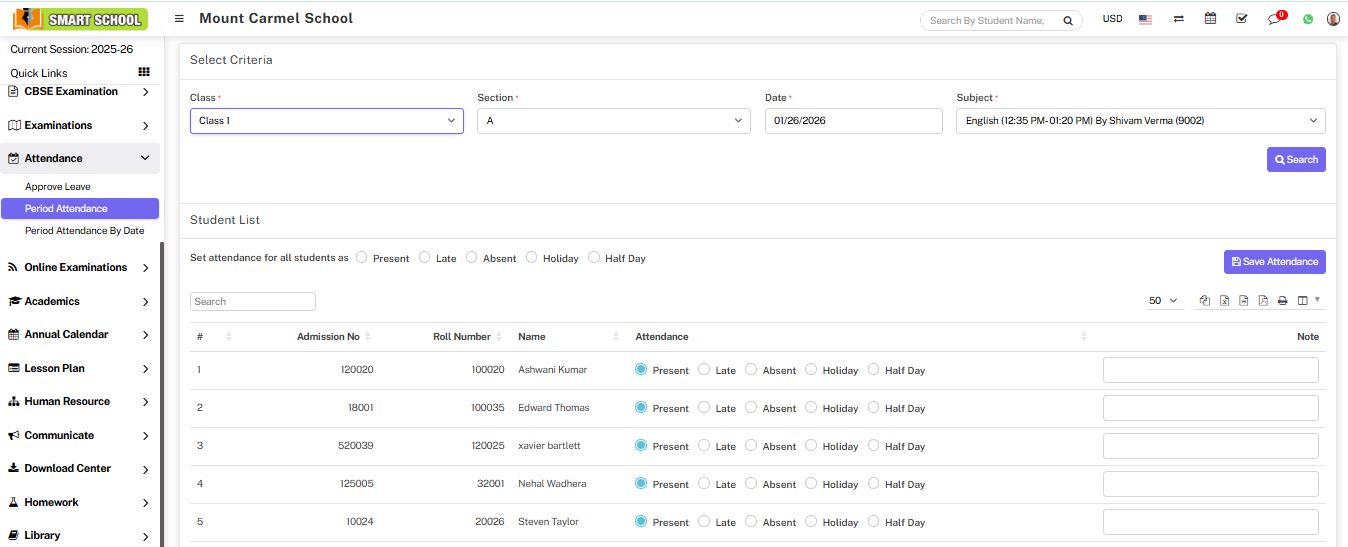
And if you want to see the attendance by date you just need to go attendance > period attendance by date and select the class, section and date than click on search button, Student list will open below, and you can see the period wise attendance of multiple student’s in that relevant class and section that you set.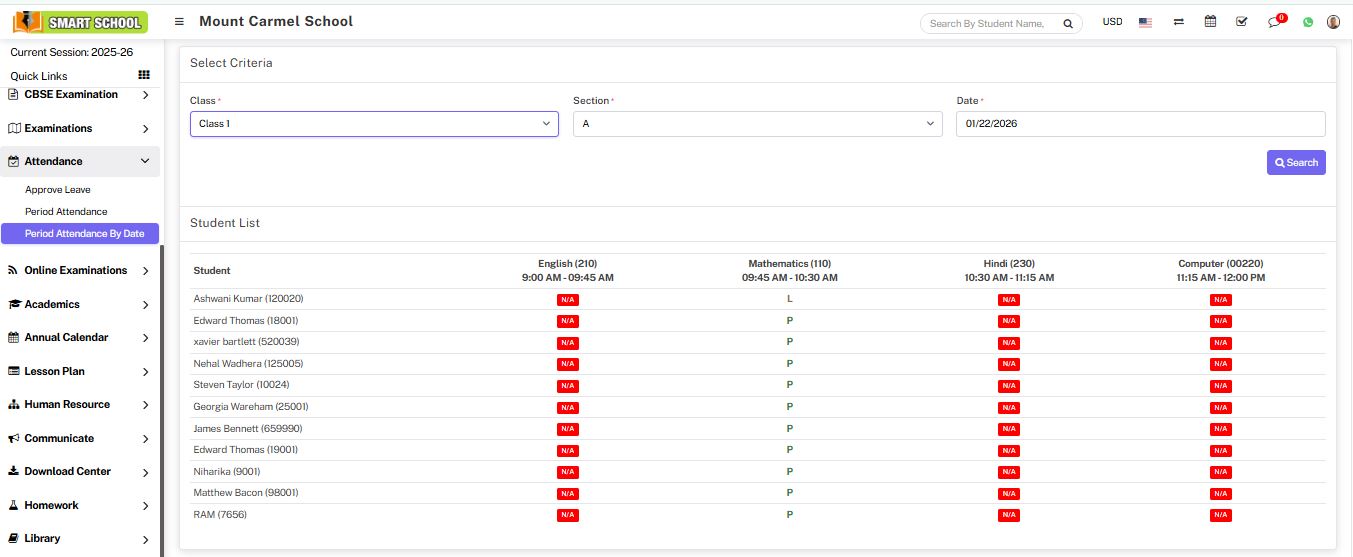
In attendance type, you can also see the option of biometric attendance available. By this feature you can manage the attendance biometrically. Here two option is available, disabled and enabled. When you will keep the biometric attendance disabled and click on save button, class attendance time for auto attendance submission will not be show below and you won’t be able to mark the attendance biometrically.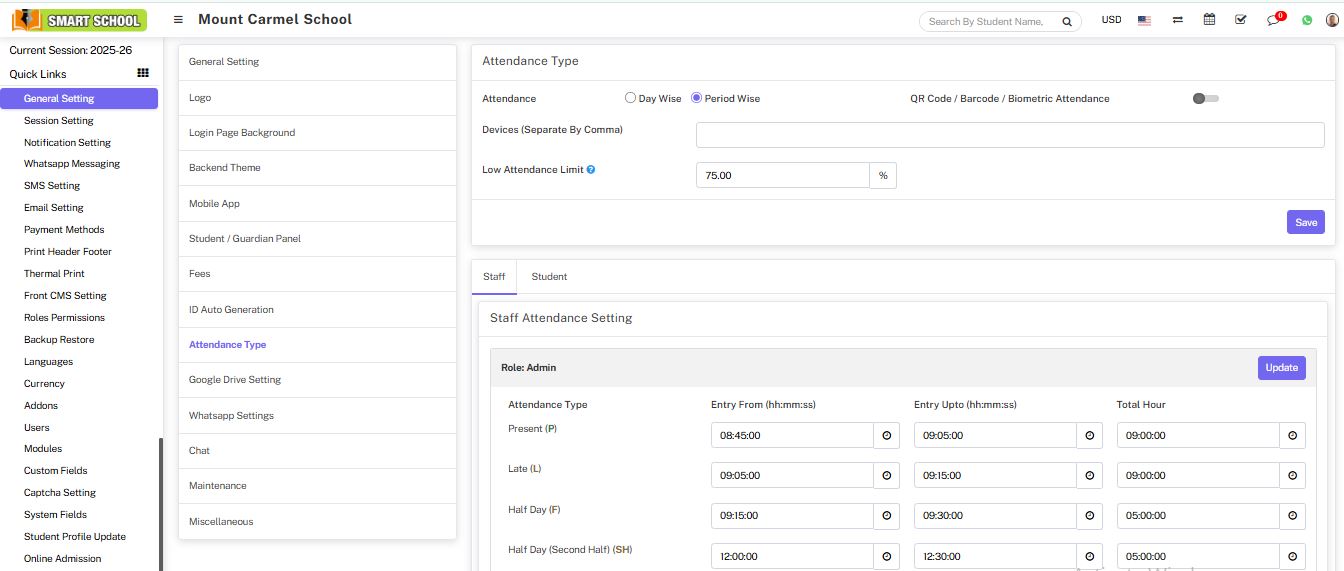
And if you will keep the biometric attendance enabled and click on save button, class attendance time for auto attendance submission will be show in below and you can mark the attendance biometrically. You just need to set the specific school time for every class and section and click on save button which is showing on right below.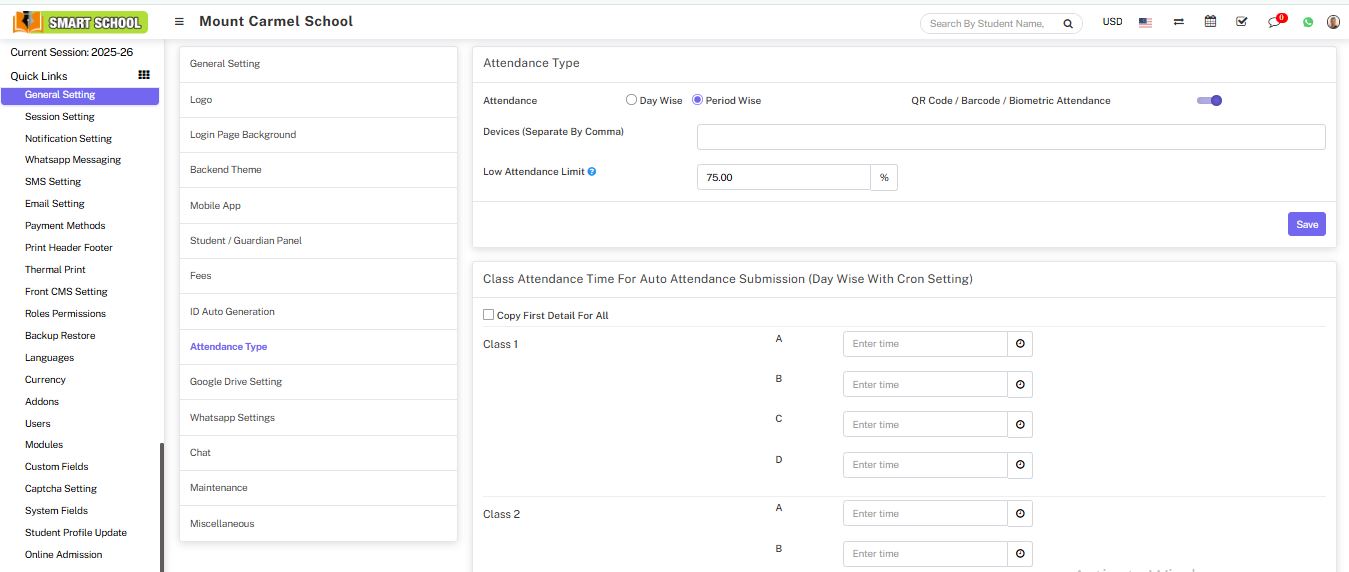
Note: - if you want to set the same time for every class and section, you need to check the checkbox of copy first details for all.
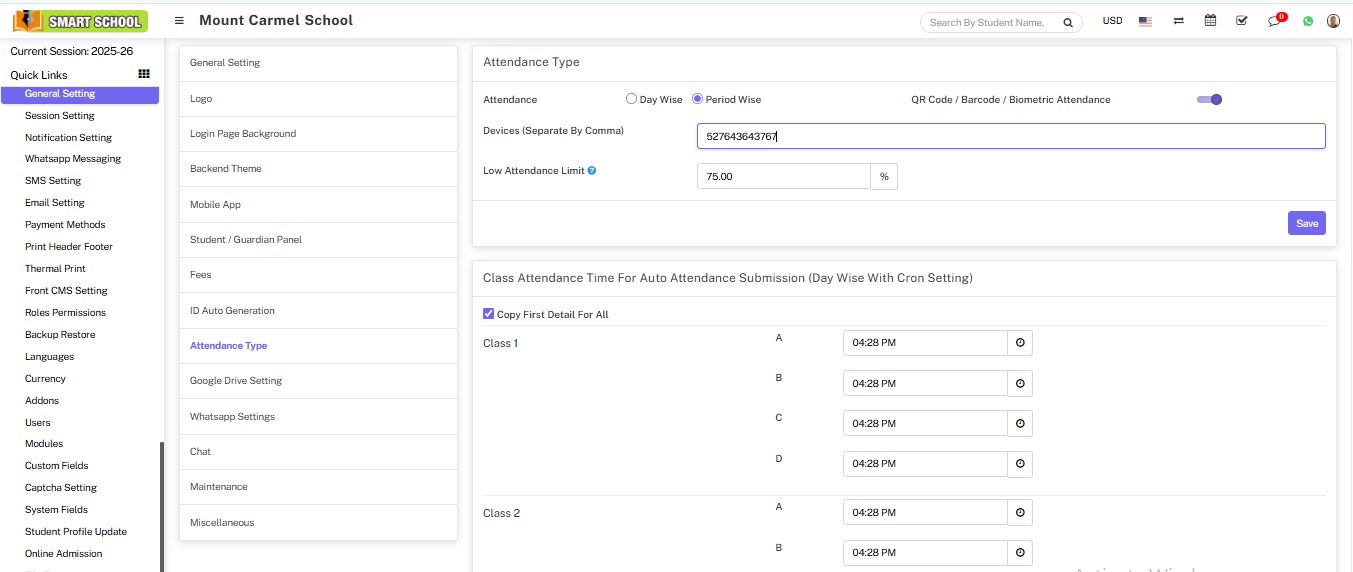
Devices (Separate By Comma)
When using multiple biometric devices, you need to manage their respective device IDs by separating them with a comma. Simply fill biometric ID in the input field, and if you want to fill in another biometric ID, just mark the comma and fill in the next ID. Repeat this process for each additional biometric device.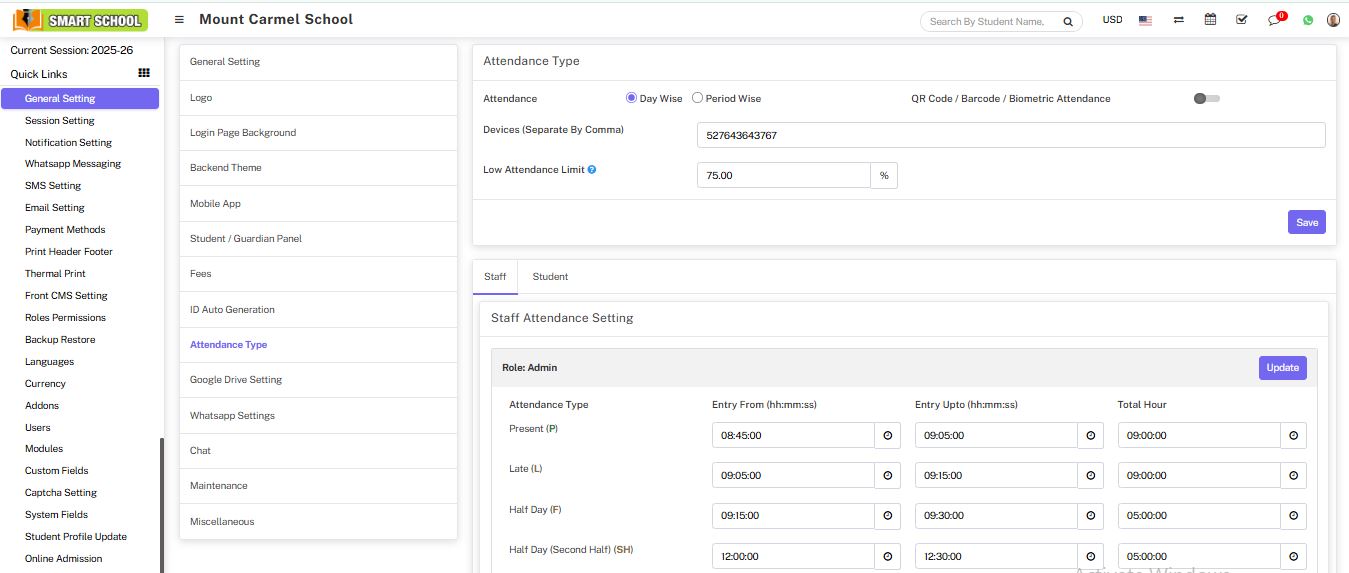
Low Attendance Limit
To Low Attendance Limit, you need to go System Setting > General Setting > Attendance Type. In attendance type, you can see the last option of low attendance limit.
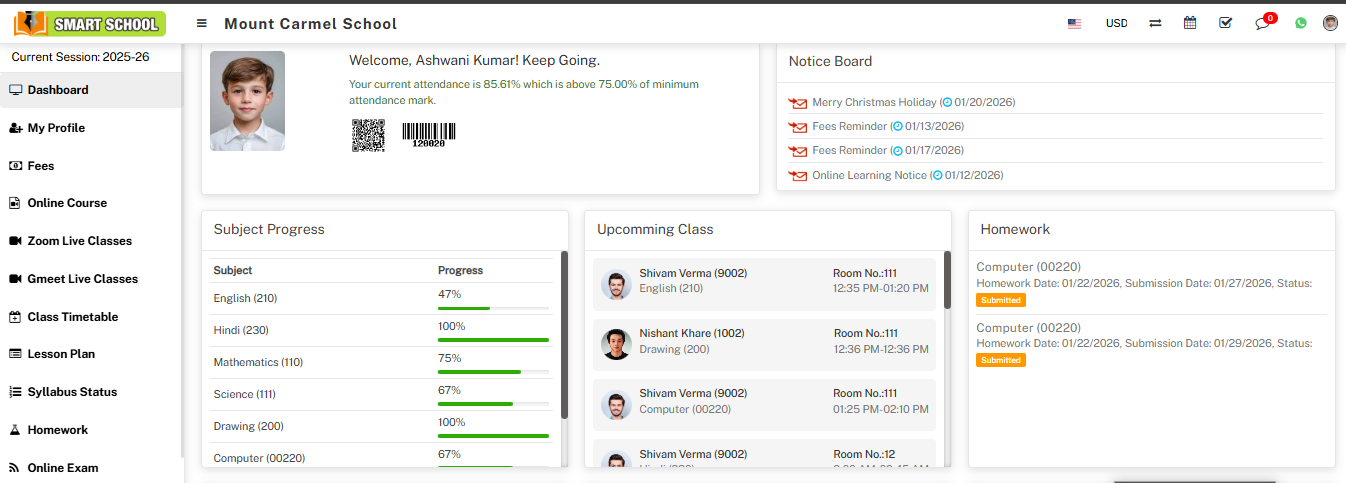
With the help of this feature, you can set the limit of attendance in the form of a percentage and then click on the save button. The attendance limit will be set and a message will be displayed on the student dashboard. In the low attendance limit, one question mark is available, it will show as Below it attendance will be mark as low attendance.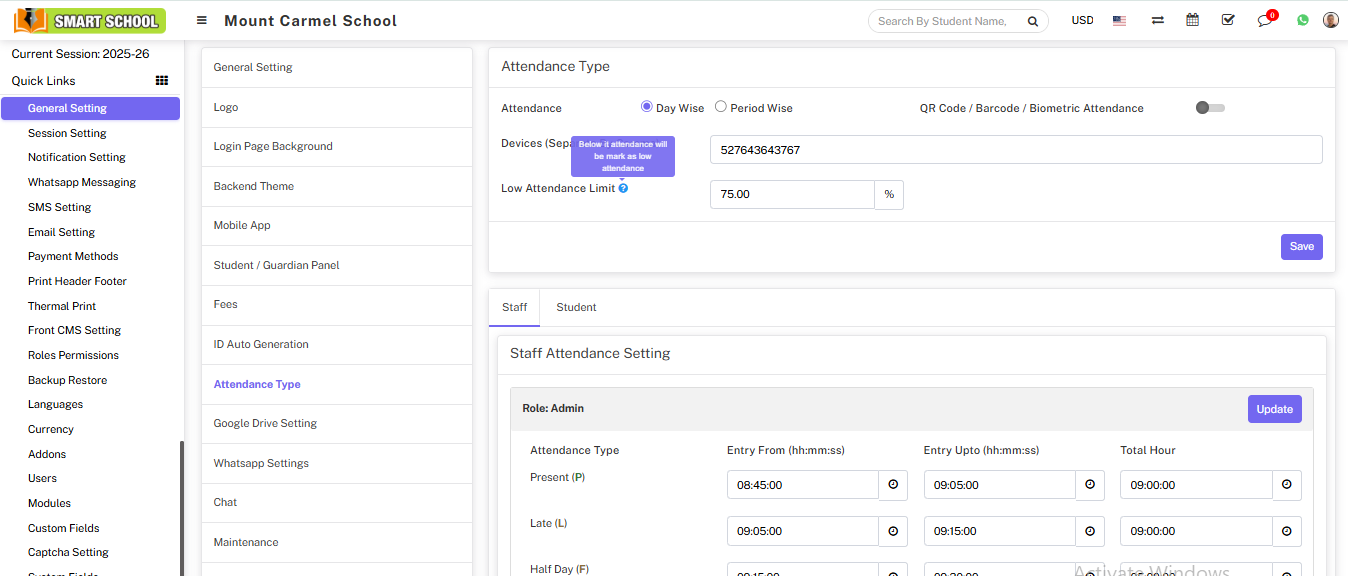
If you do not set a low attendance limit, no messages will appear in the dashboard. 
If student get the lower attendance, which is lesser than the low attendance limit so that it will show the red alert message in the dashboard. Which means student attendance is not as per the required attendance. 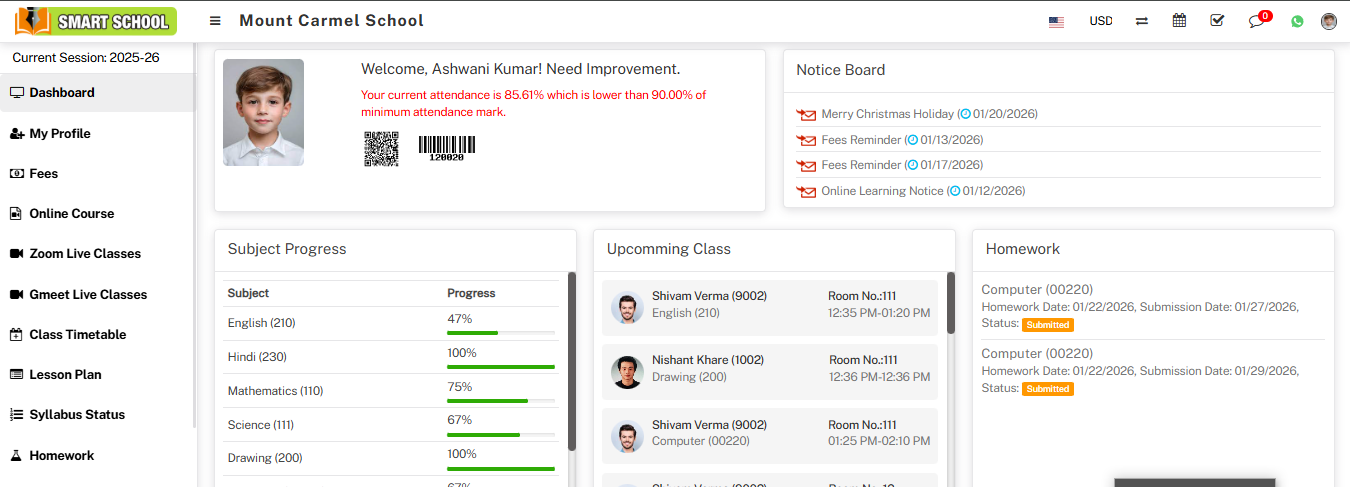
If student get the maximum attendance, which is more than the low attendance limit so that it will show the green alert message in the dashboard. Which means student attendance is as per the required attendance.