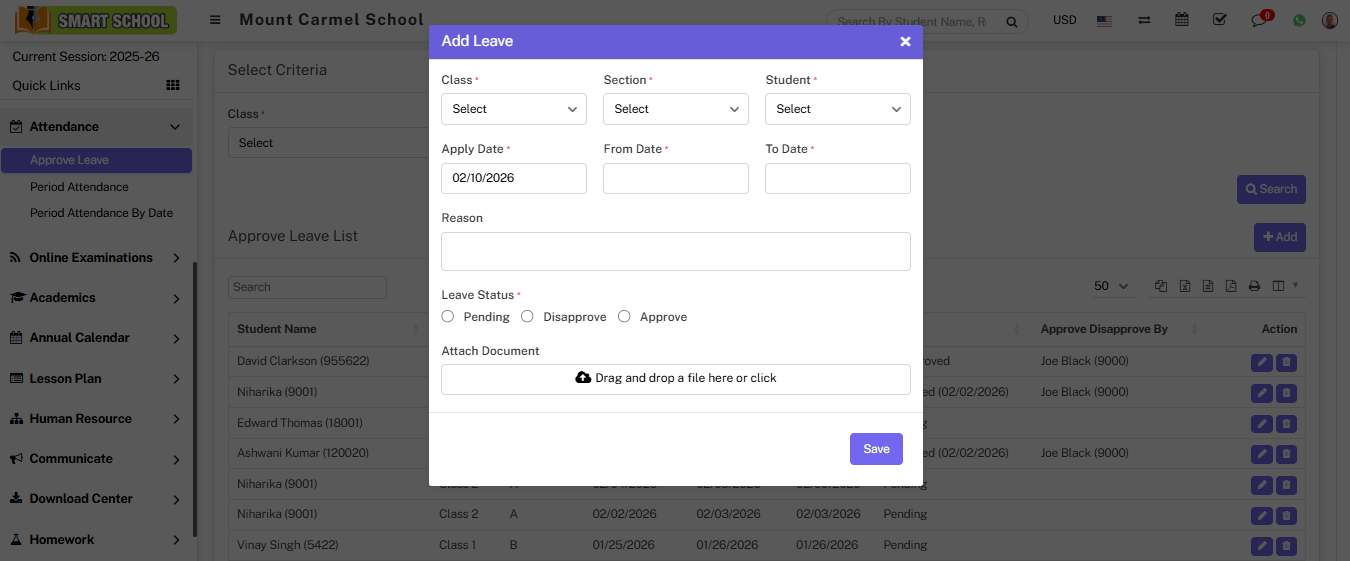
then click on Add button showing at right corner in the approve list page, at click of this button Add Leave modal will open.
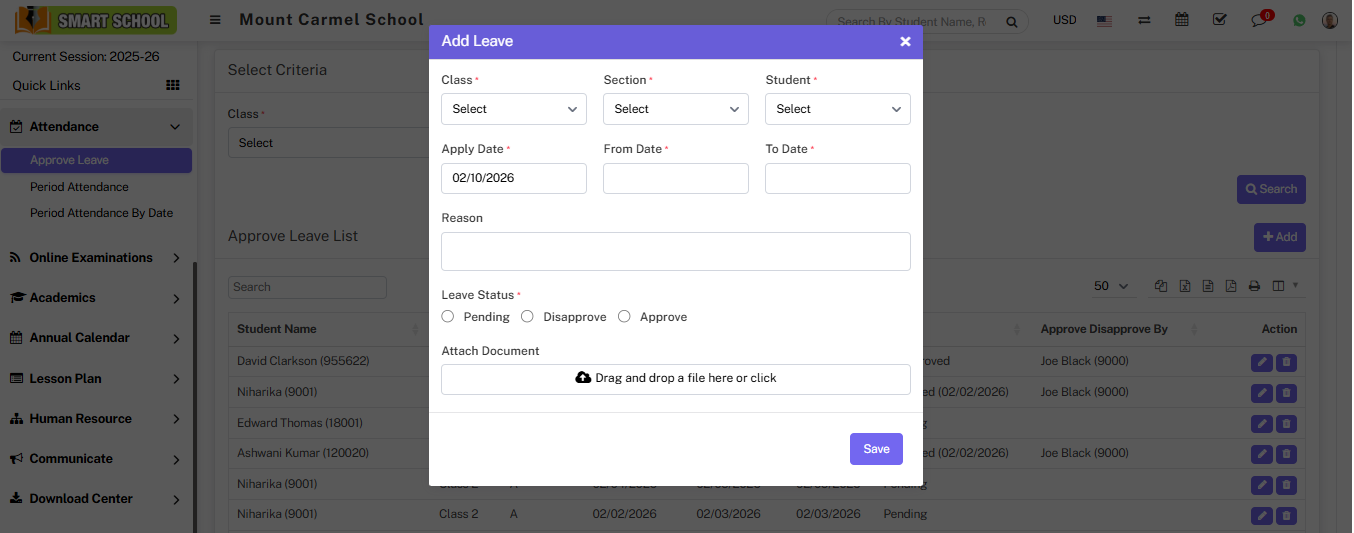
Here select Class, Section and Student and enter Apply Date, From Date, To Date, Reason, Leave Status (Pending, Disapprove, Approve) and Attach Document (if you want to attach any file) and then click on Save button. You can view this added record in the below of the page.
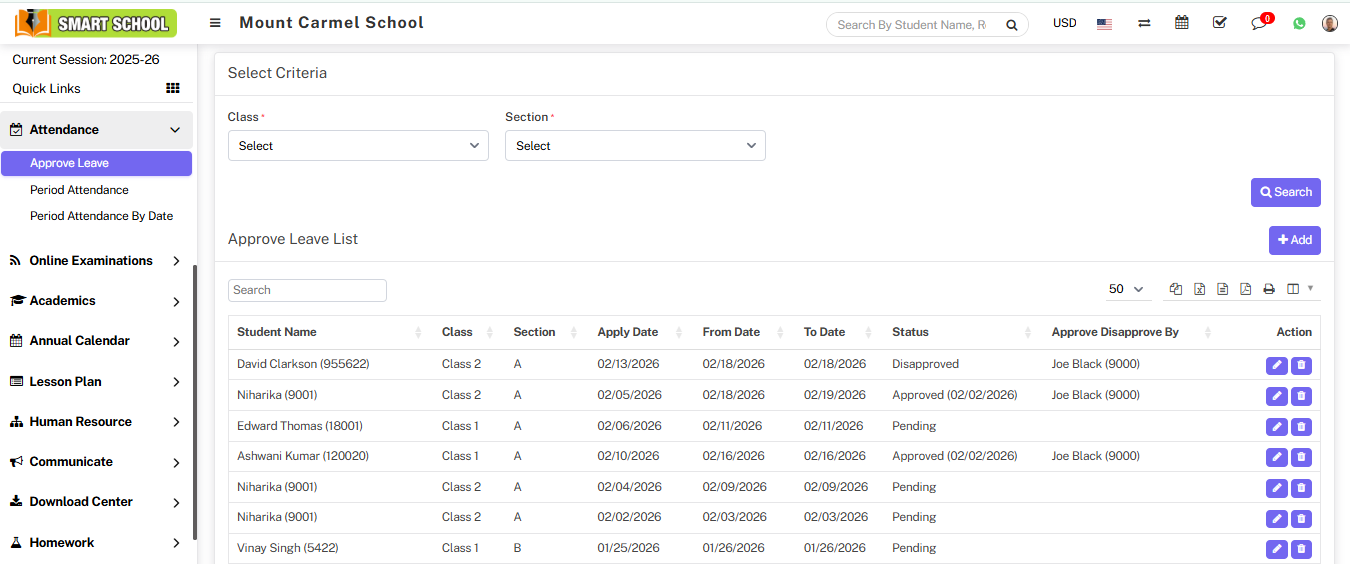
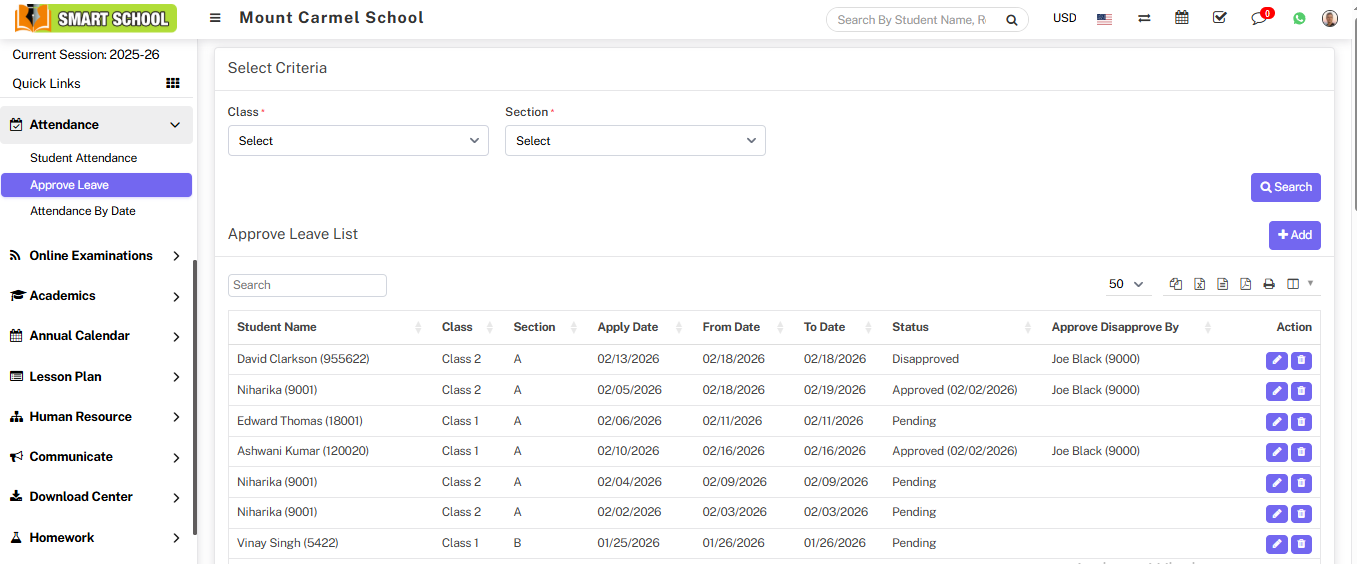
Here select Class and Section and then click on Search button. The list of approve leave will be shown in the below of the page.
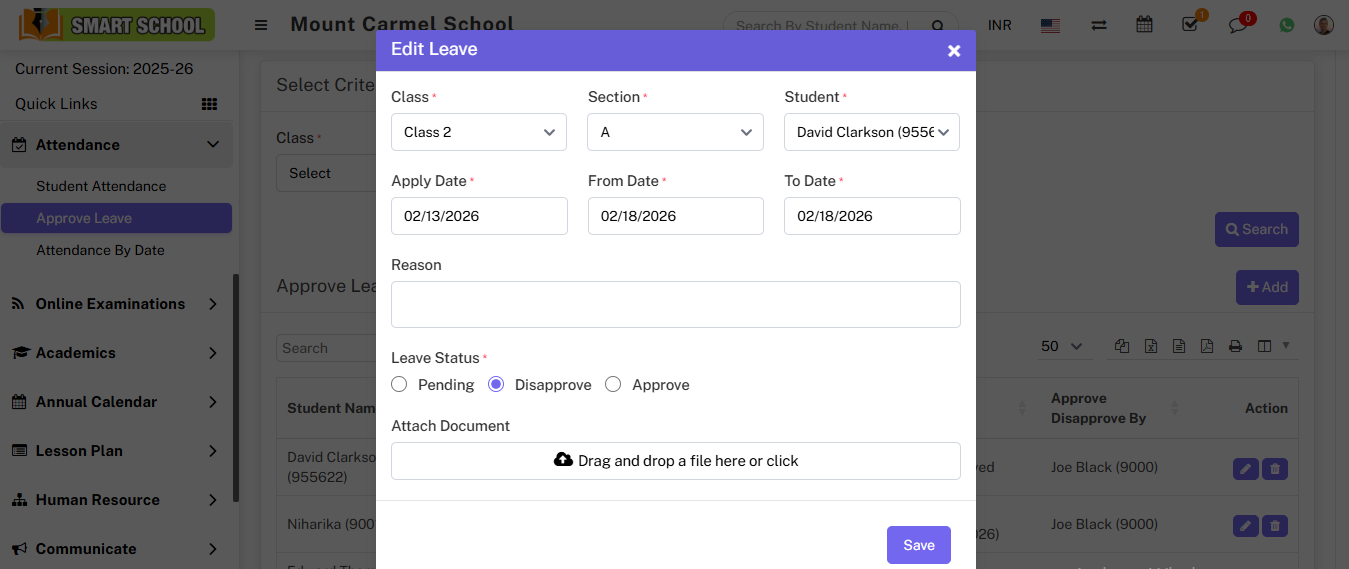
To edit the applied leave, click on the Edit icon showing in action column. An edit model will be open, here superadmin can edit applied leave and change the leave status (pending, disapprove, approve).
To delete the applied leave, click on the Delete icon present in the action column. When you click on it, a confirmation window for deleting appears.
You can download the attached document by clicking on the download button present in the action column.