To upload / share content, go to Download Centre > Upload / Share Content, Content List will be open, here you can see multiple content and you can search these content by using search tab.
To Upload Content, click on the Upload button, showing at the top right corner, upload content model will be open, here.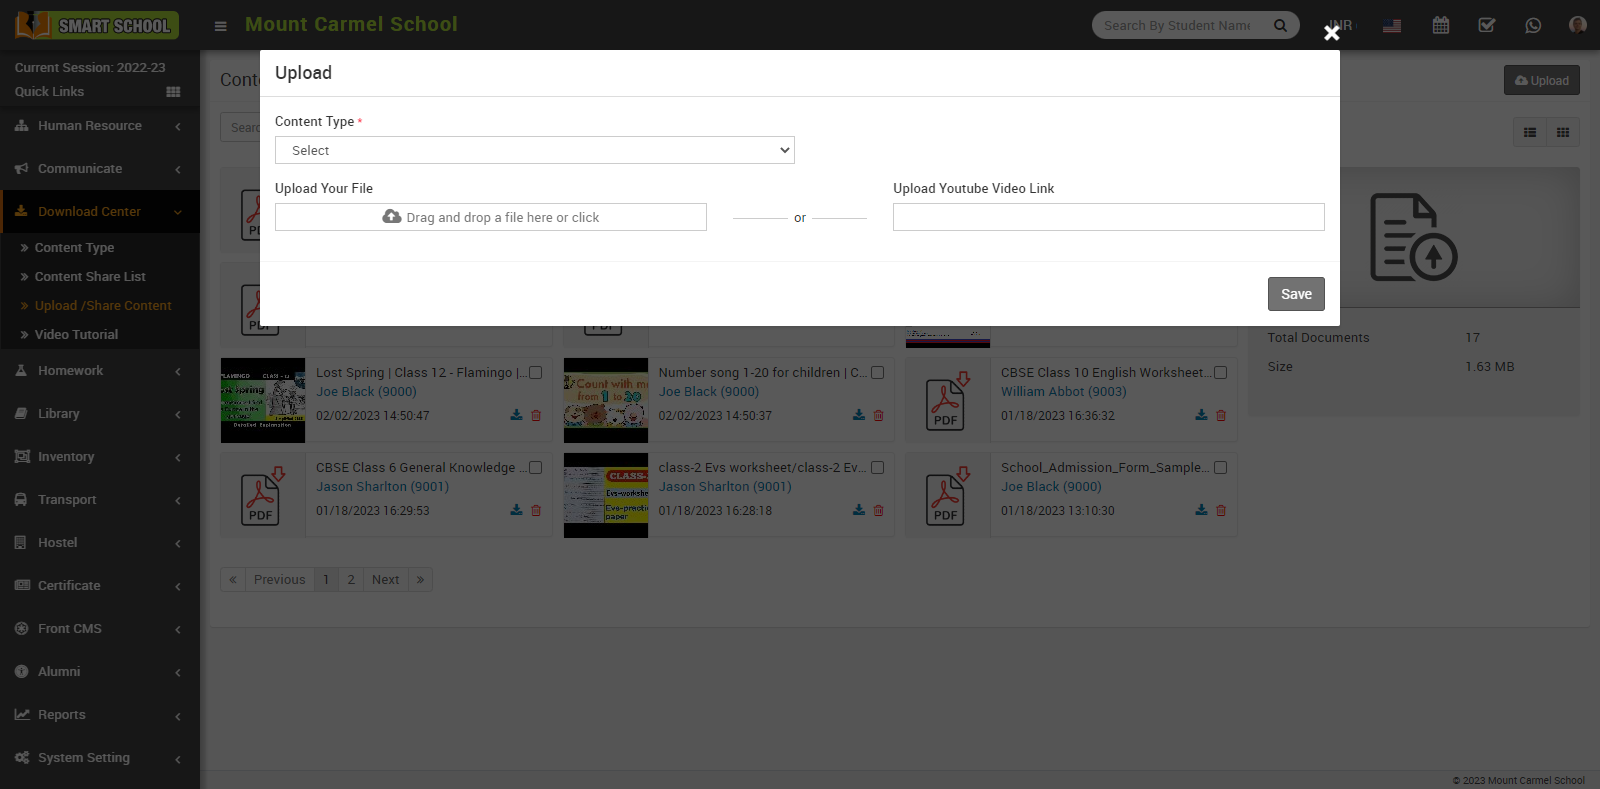
select the Content Type. Now in below you can either Upload Your File or Upload YouTube Video Link then Click on the Save button, so that content upload successfully.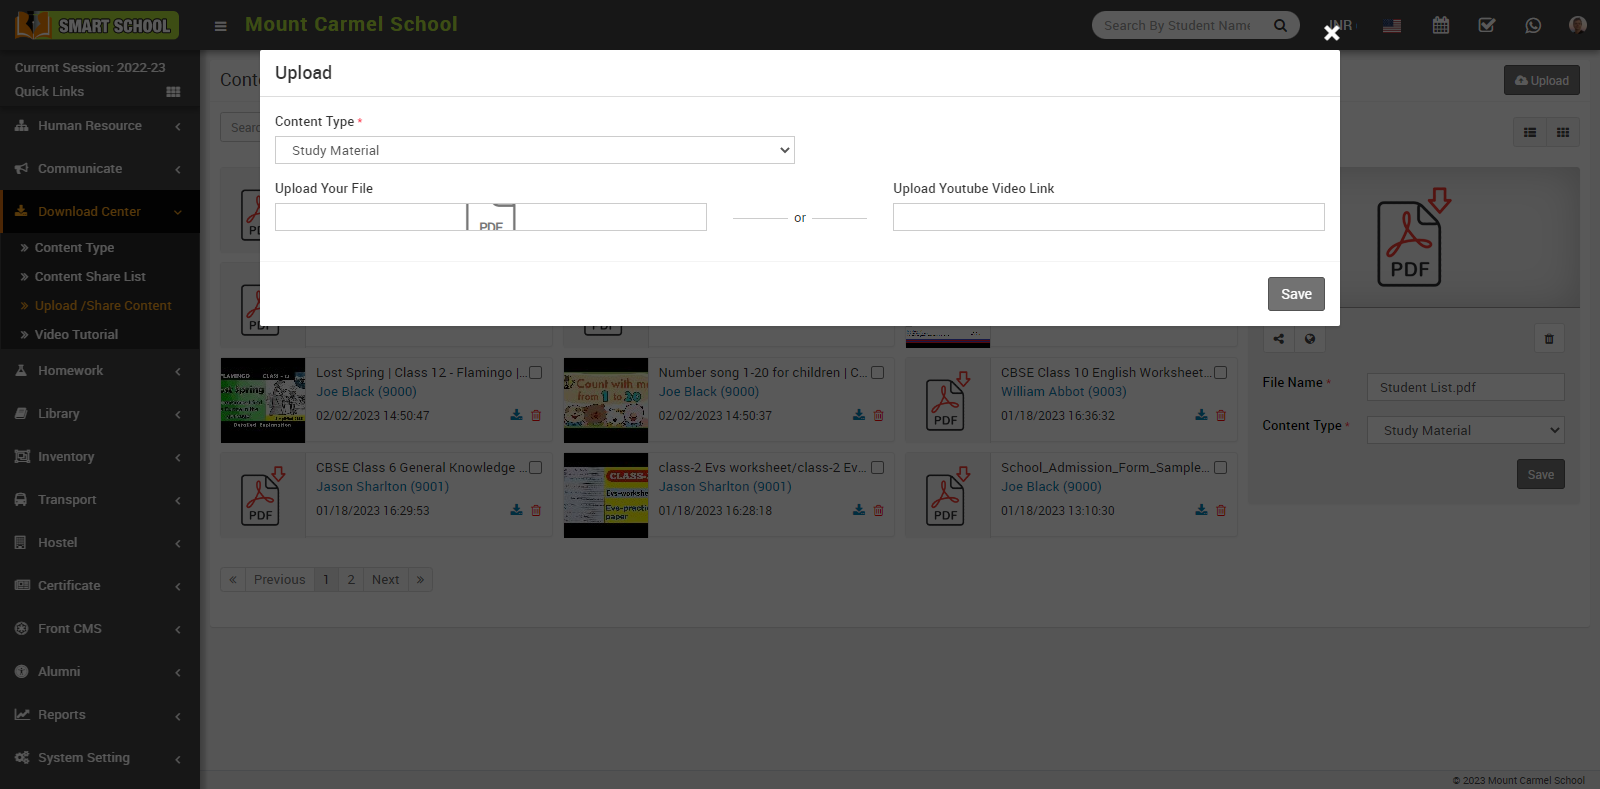
You can view the content in the content list and if you want to search the particular content just click on search file, write the name of content and click on search button, your content will appear below in content list as well as you can also view this content by using the list view and card view options, which are shown in below of upload button.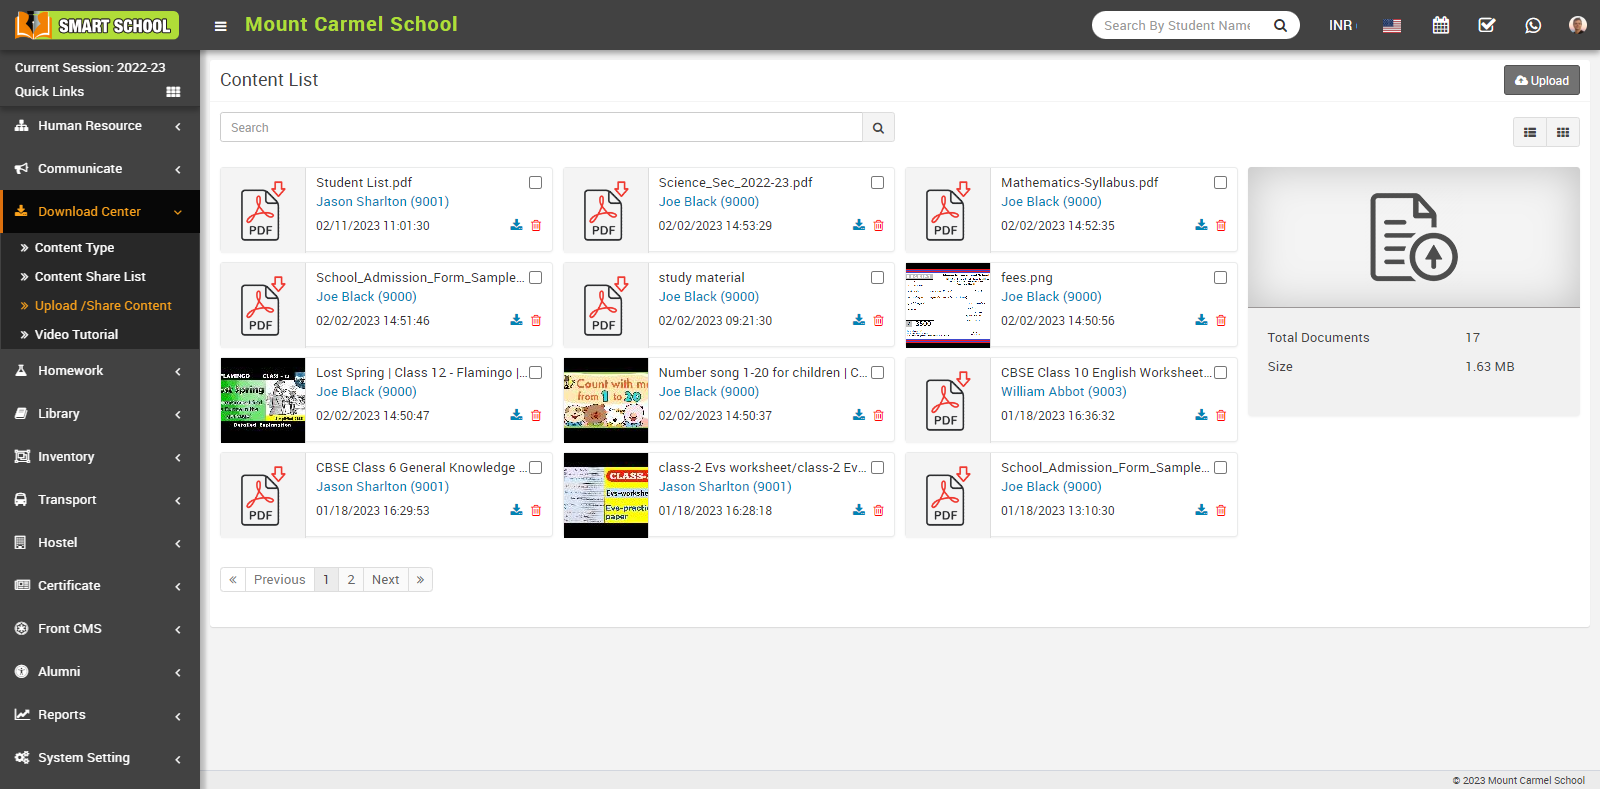
To rename the file name and content type, follow these steps: Choose any file from the content list and click on its content name. This will open the file name and content type fields on the right. In the file name field, you can rename the file, and in the content type field, you can select the desired content type from the drop-down menu. Once you have made the changes, click the save button, and your file name and content type will be updated successfully.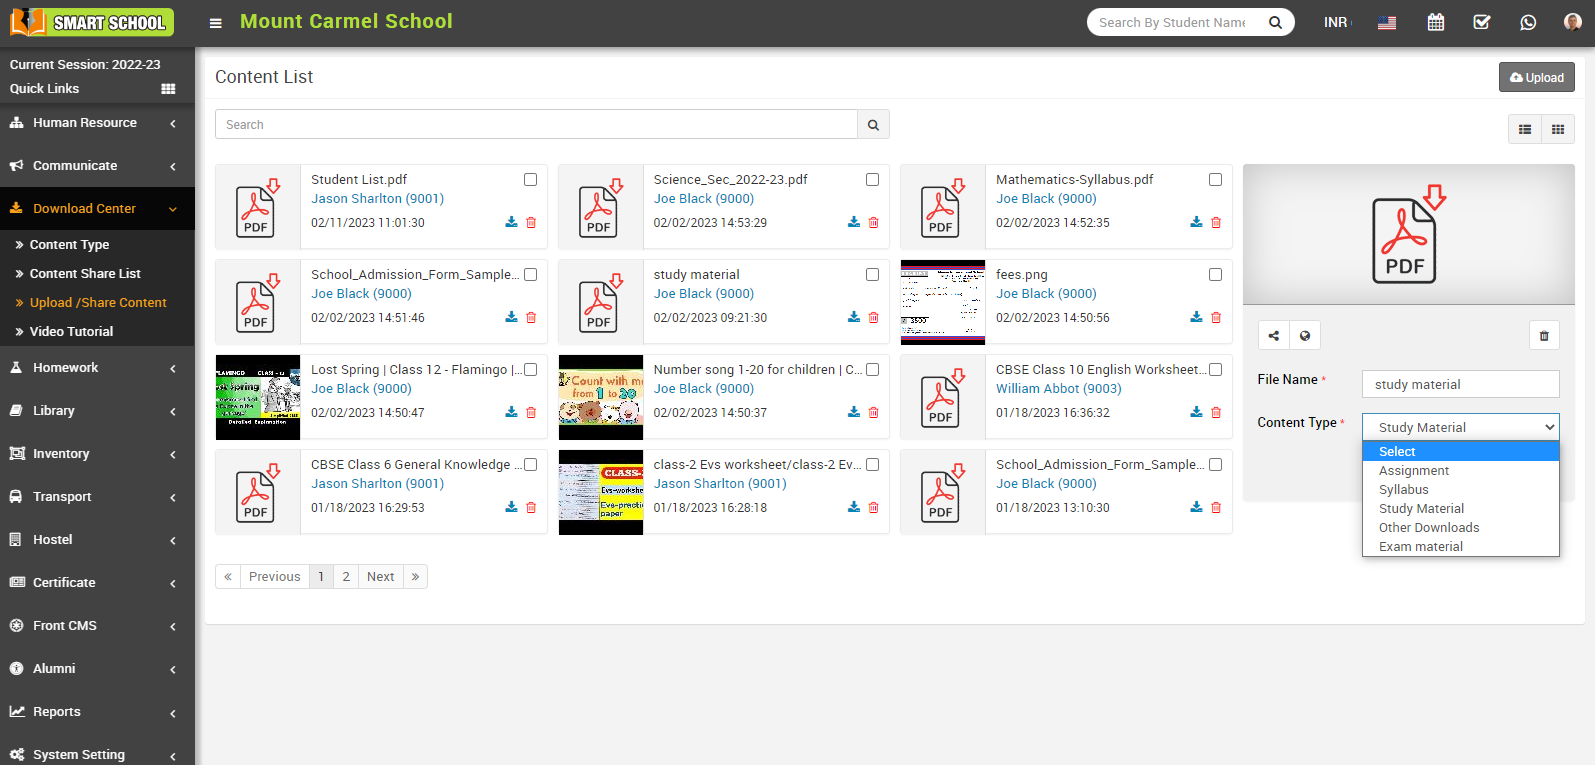
To share content, simply check the checkbox of the content or you can check the multiple content, at the same time and at the right side, you can see the count of selected files.
Now in file count below, you can see the content sharing option available, by this feature you can share the content. Simply click on share icon.
Shared selected model will be open.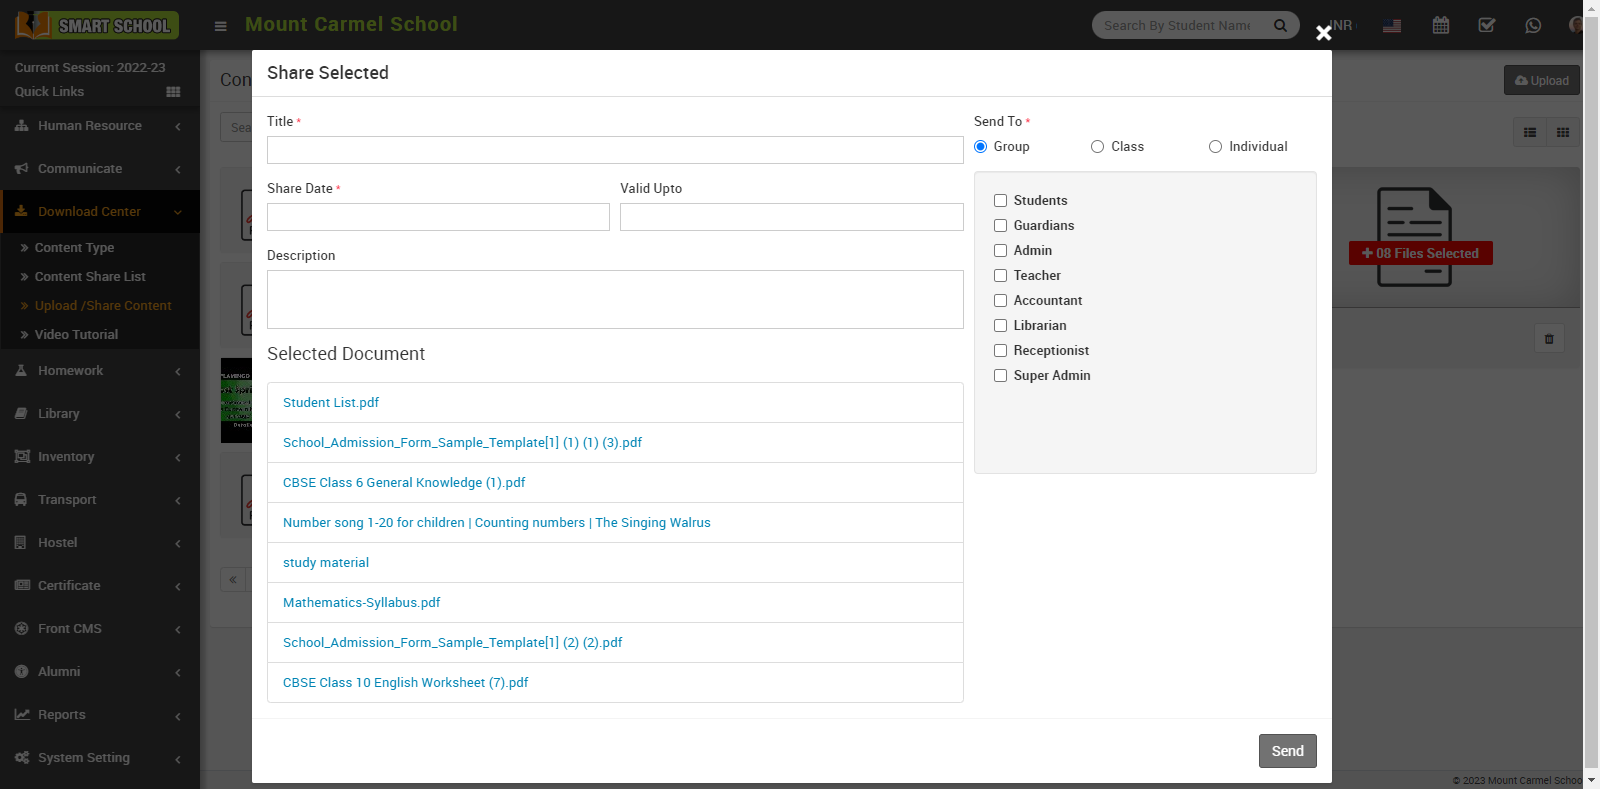
In this model, there are multiple options available. First, you need to fill in the title of the shared content, then select the share date and the date until which the content will be valid up to. You should also provide a description about the shared content. After that, you can see a list of selected documents that you want to share. On the right side, you will find the 'send to' option. You can use this feature to share the content with a group, class, or individual. Select the group and below that, you can see multiple roles to which you can share the selected content. Choose the relevant roles and click on the 'send' button, which is located on the bottom right corner.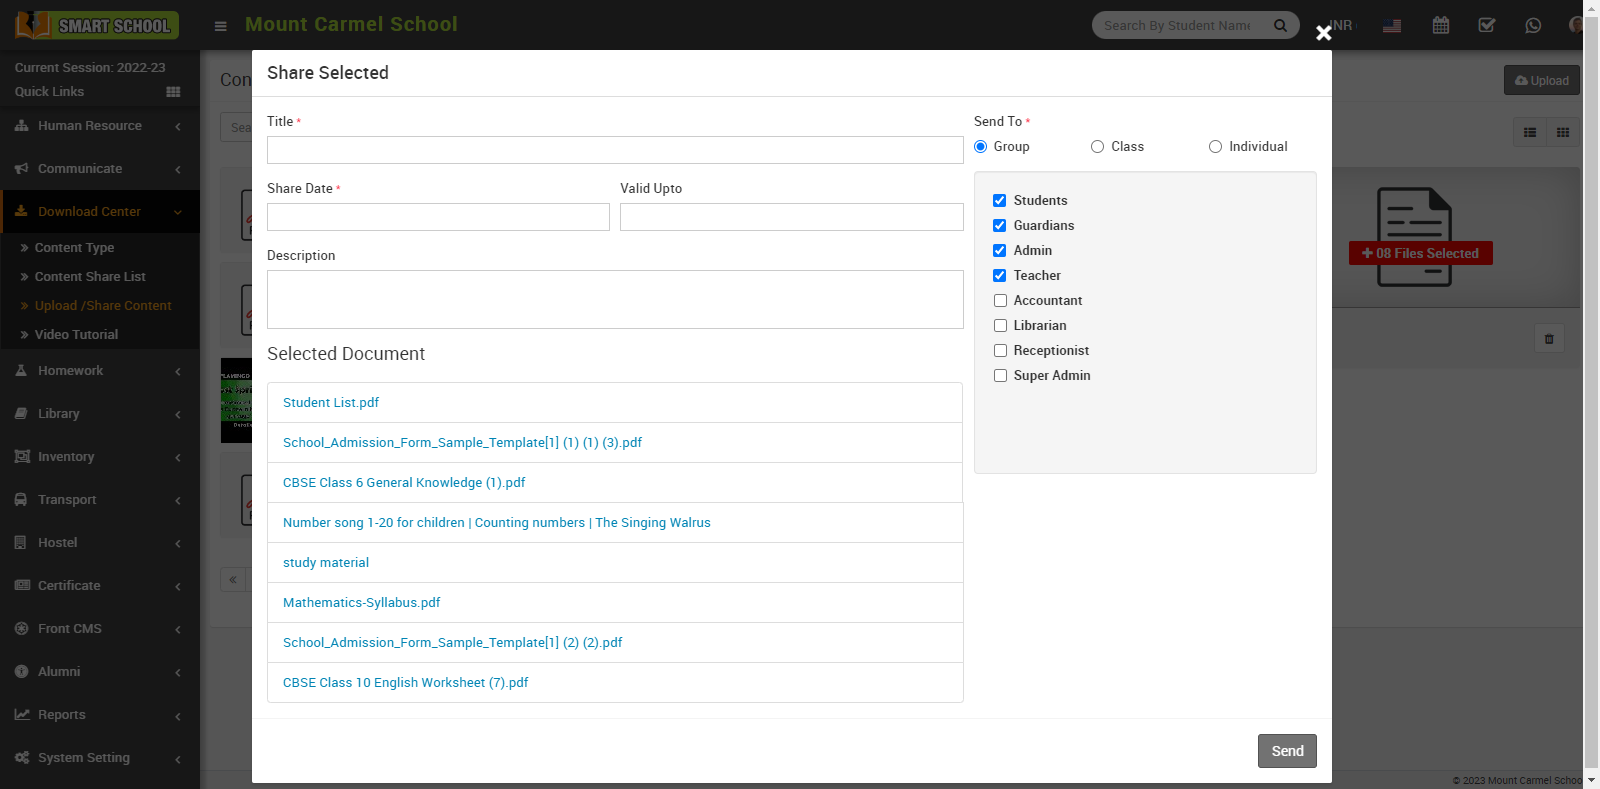
And you’re content will be shared successfully.
Now select the class to share the content.
When you select the class, select option will appear below, now select the class.
Section option will be appear below, now select the section.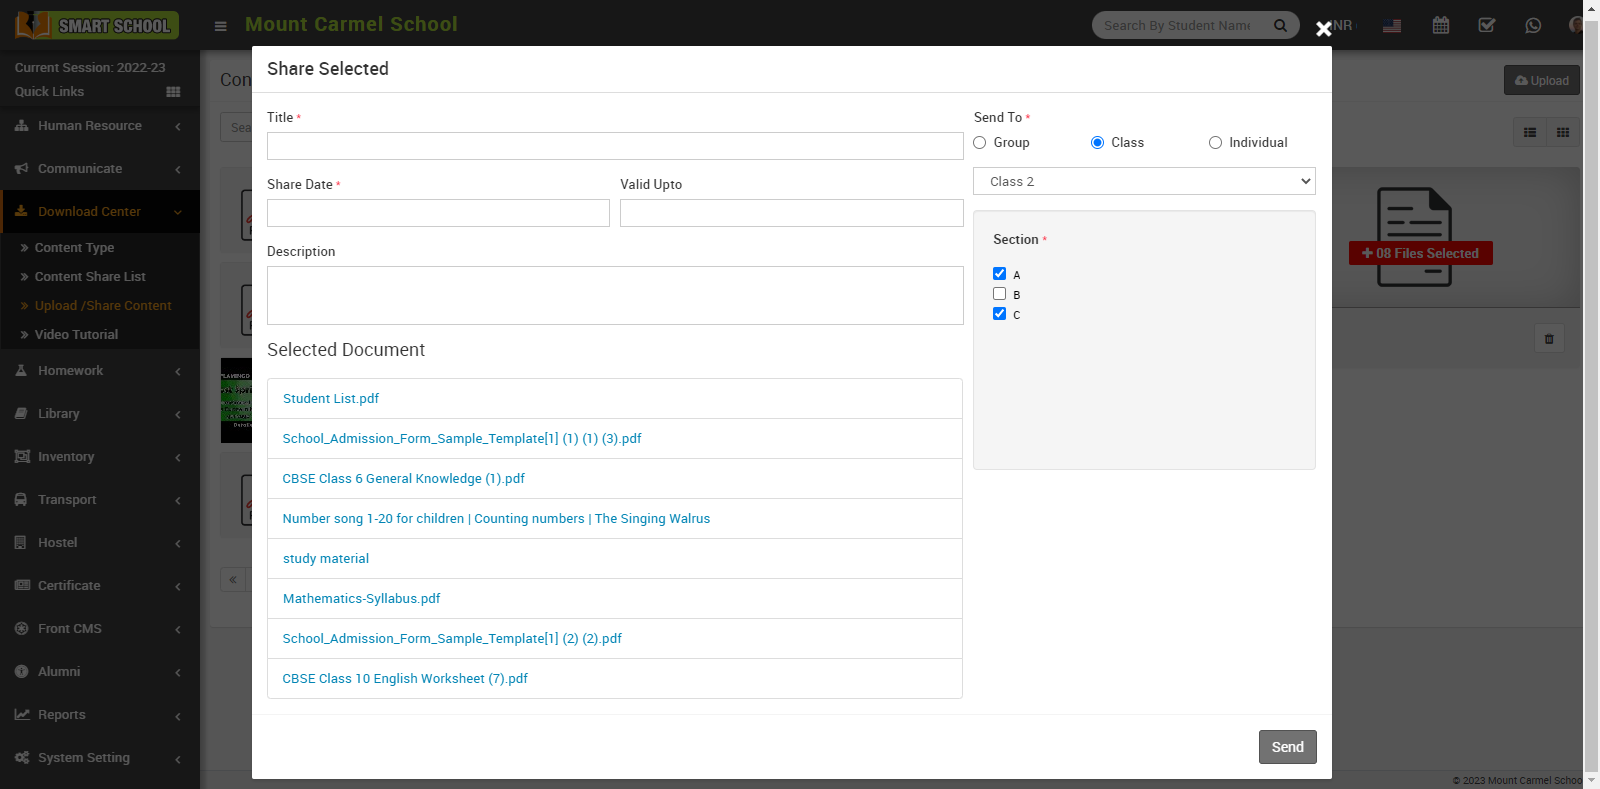
And click on the send button, your selected content will be shared successfully in relevant class and section.
Now select the individual option, when you select the individual option select and search tab will be appear in below.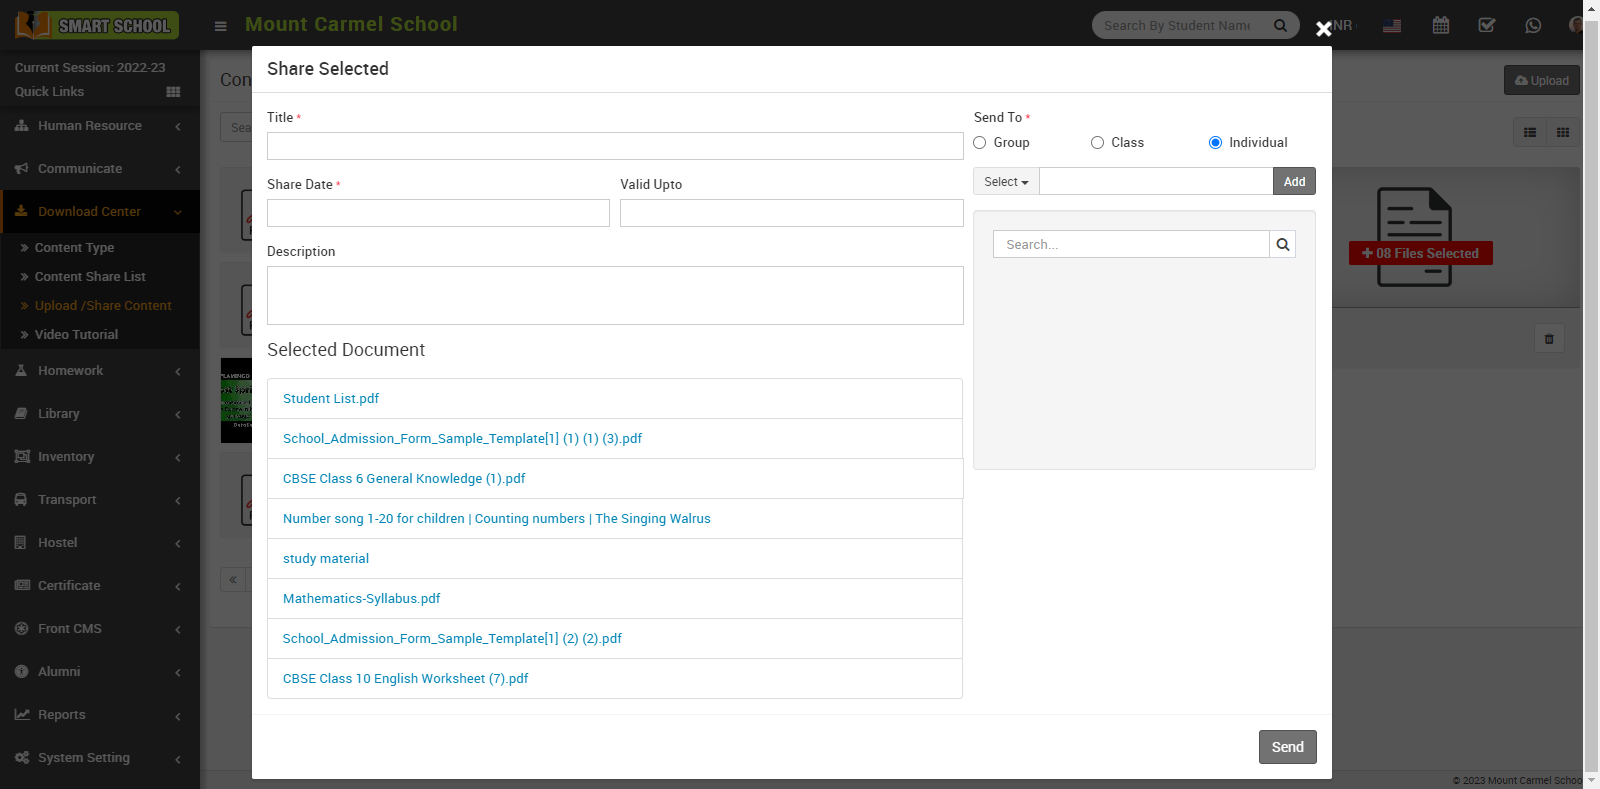
In this tab, you will see the 'select' option. Click on it and a drop-down menu will open. From here, select the role and search for the relevant individual, 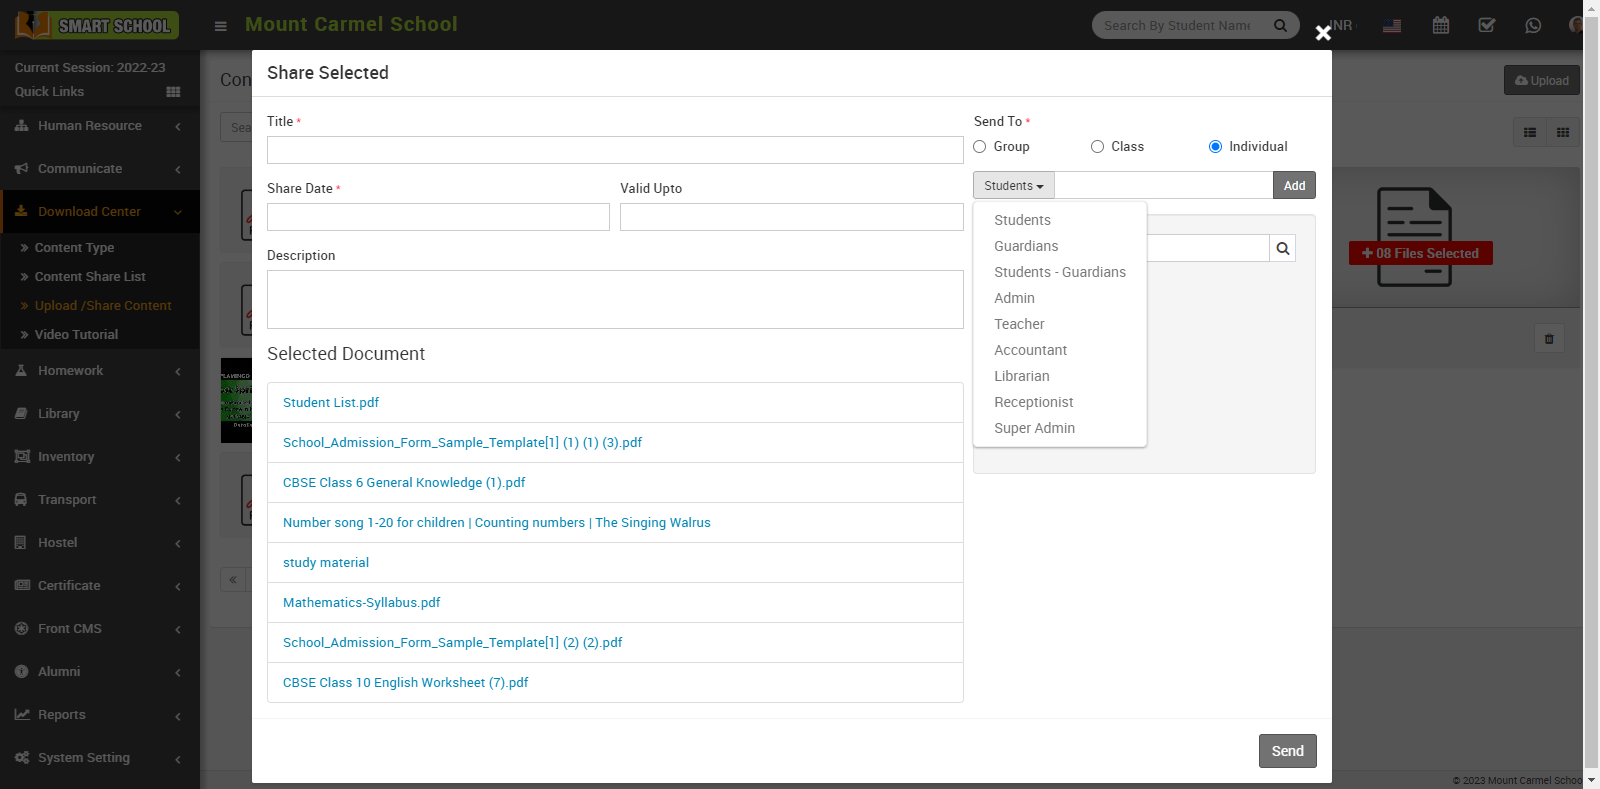
here search list will be open in below, select the person and click on add button.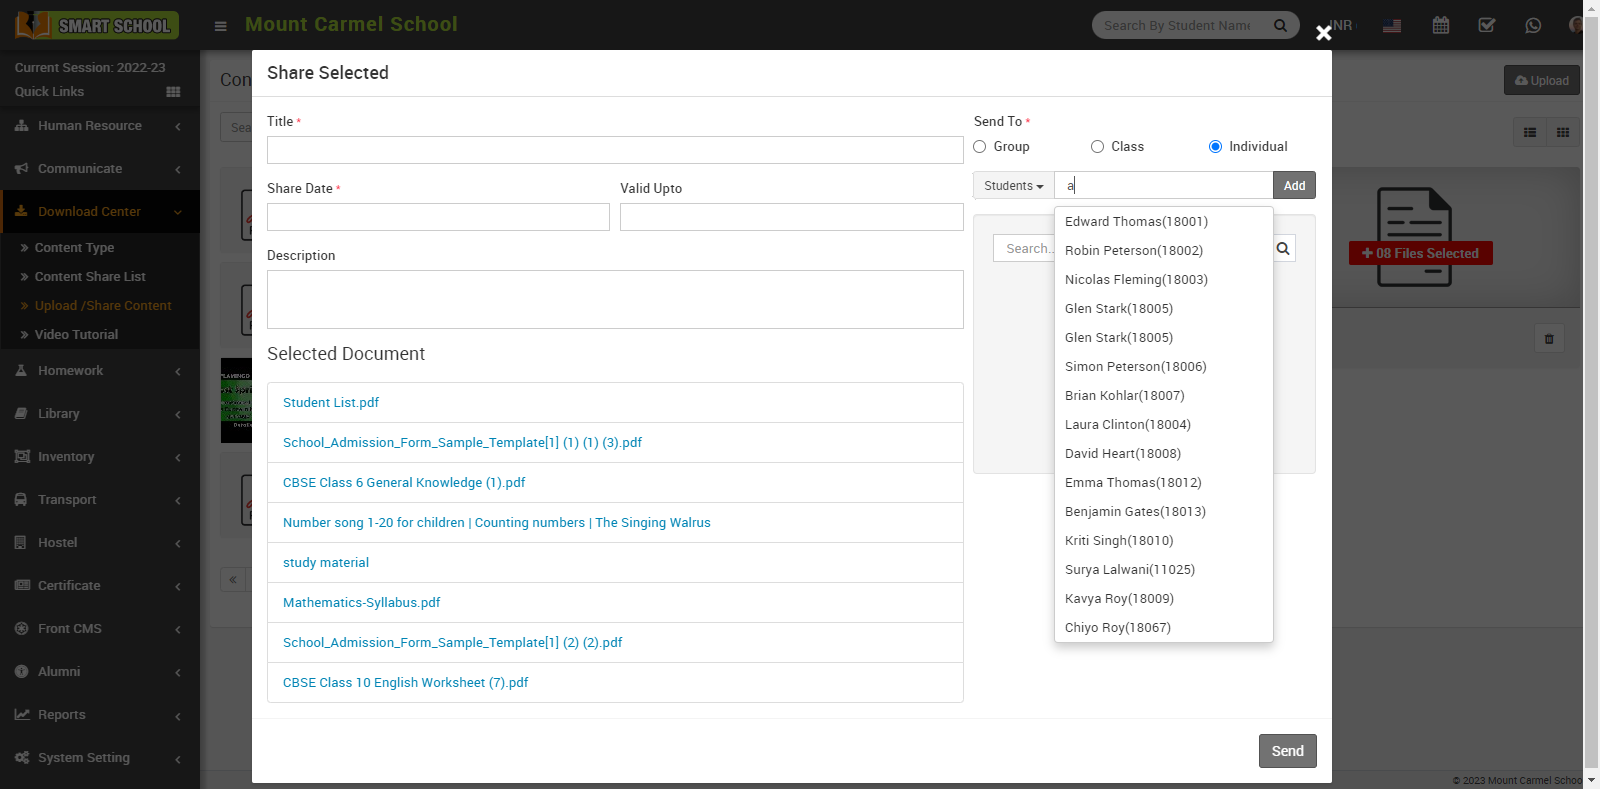
Your selected person will be added in the list.
You can also select the multiple person by using select drop menu, just select he another role and search the person then click on add button so that person will also show in below list.
If you add the multiple person and want to cross check to add this person or not, just fill the name on search box and click on search icon that person will appear from the list.
Or if you want to delete any one of them just click on delete icon showing in next to the name of person, your added person will be deleted successfully.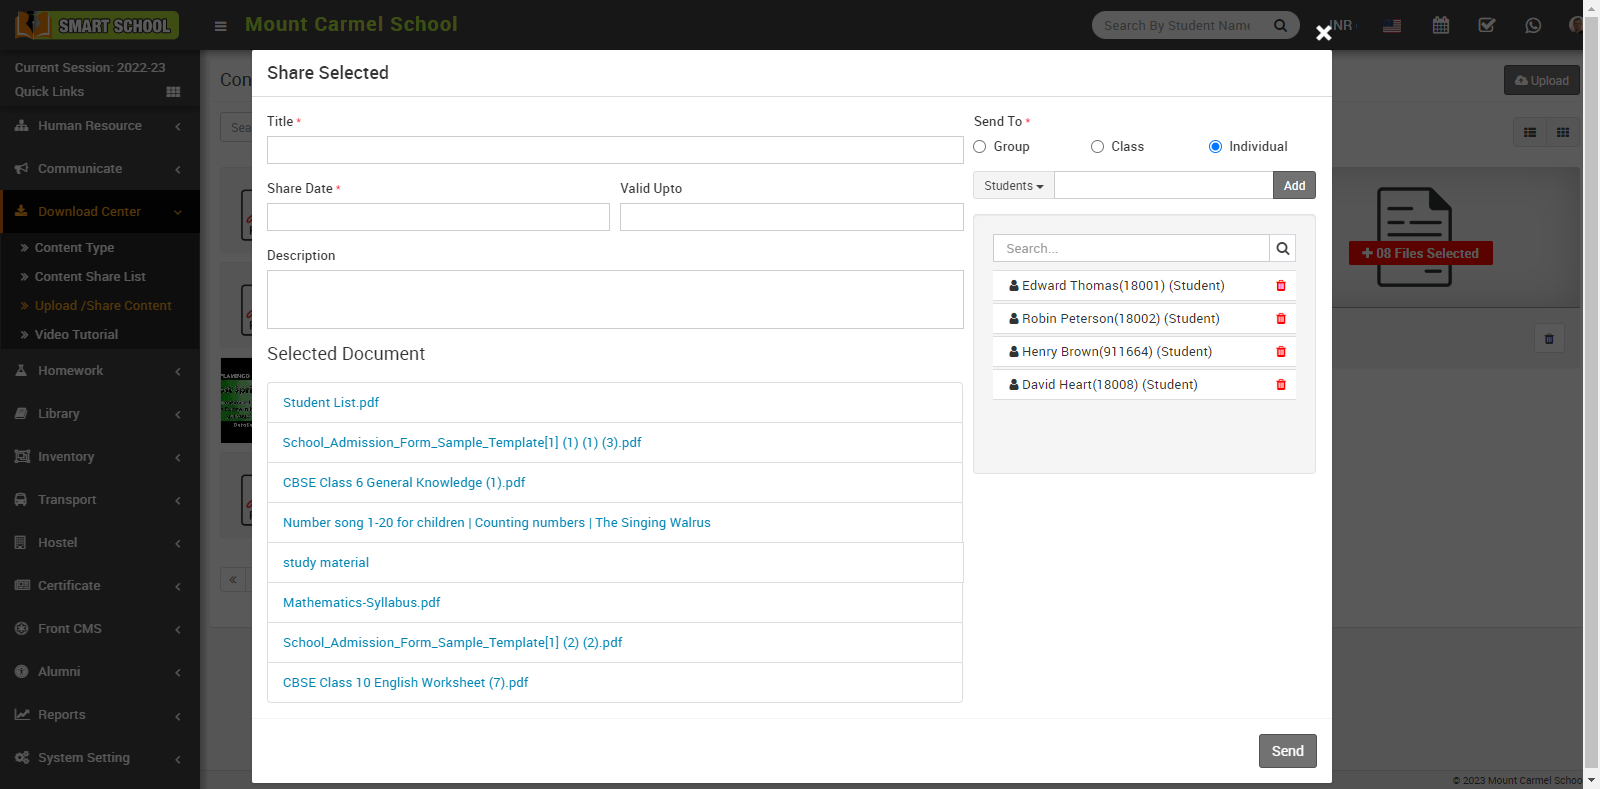
Now click on send button and your selected content will send successfully.
Generate URL
You can also share the content with the help of URL, just need to click on URL icon which is showing next to the share icon.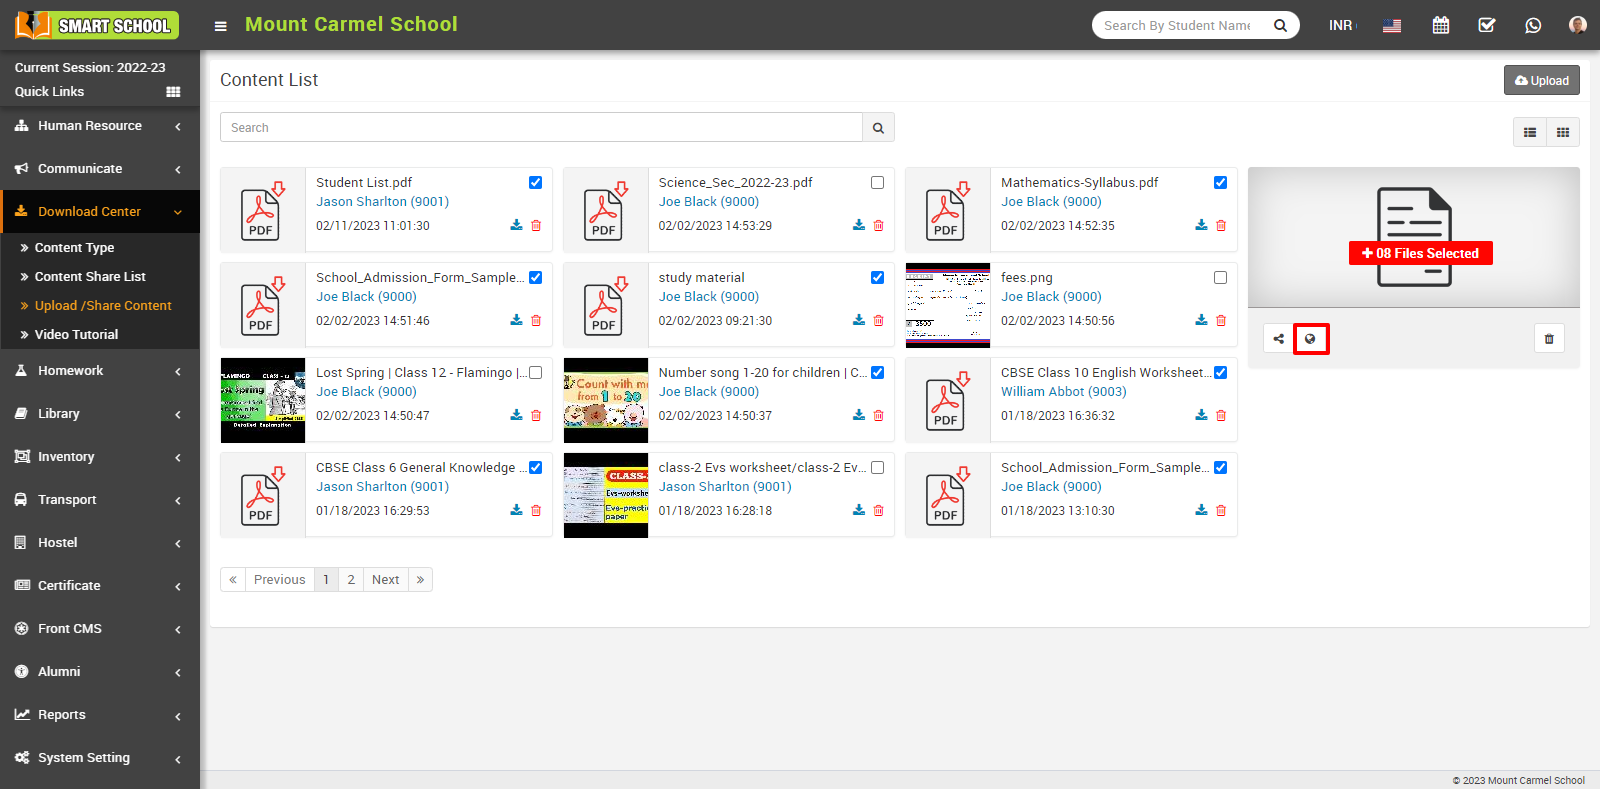
Generate URL model will be open. To generate a URL for the selected content in the model, you need to fill in the title of the content, share date, and the valid up-to date, and then click on the 'Generate URL' button.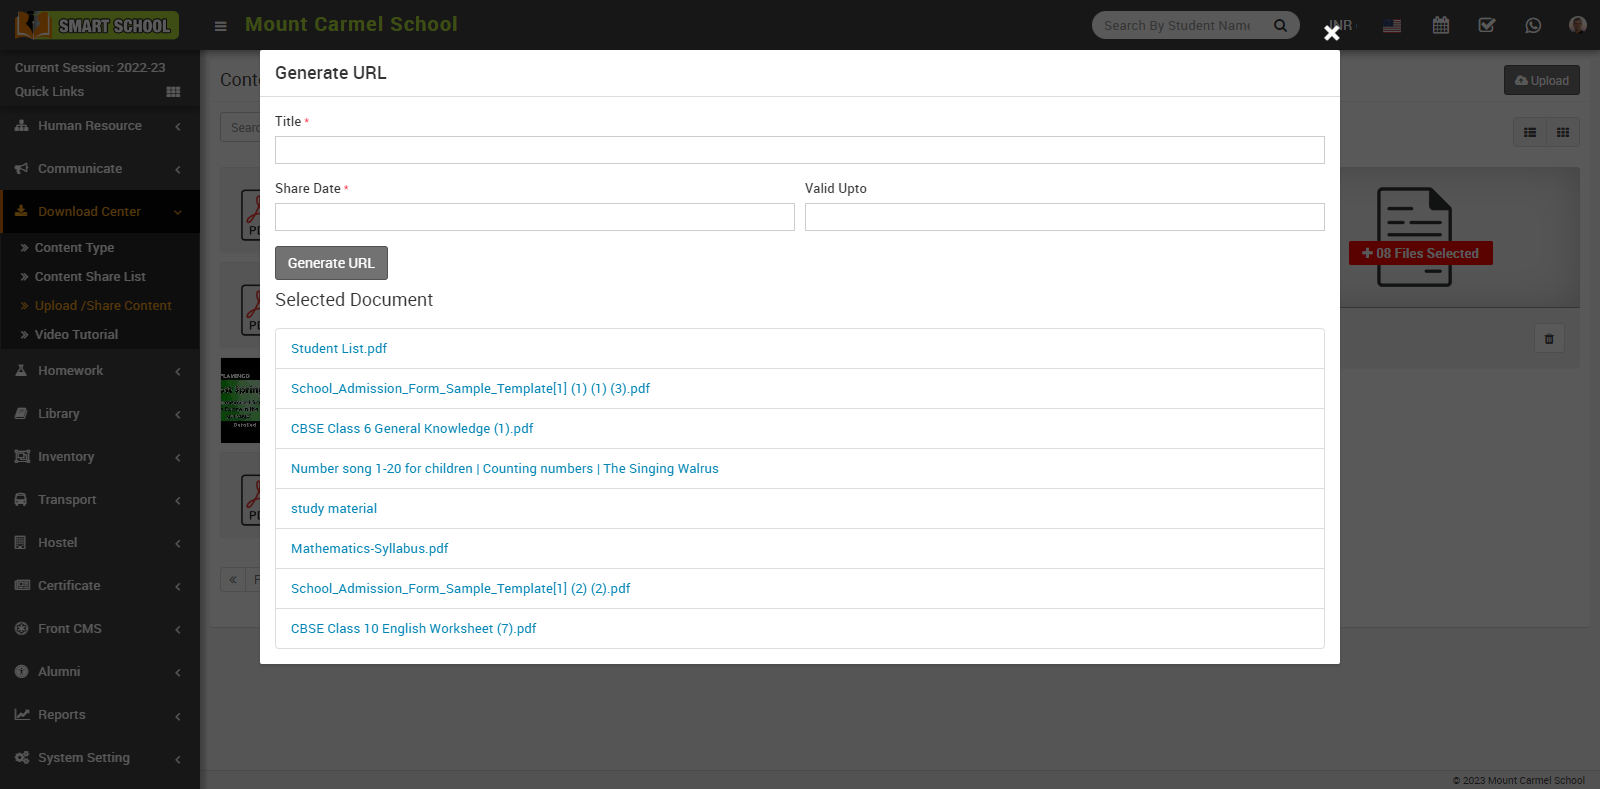
URL will be generated successfully. Once the URL is generated, you can copy it by clicking on the copy icon below the link. Alternatively, you can click on the link directly to open it in a new page.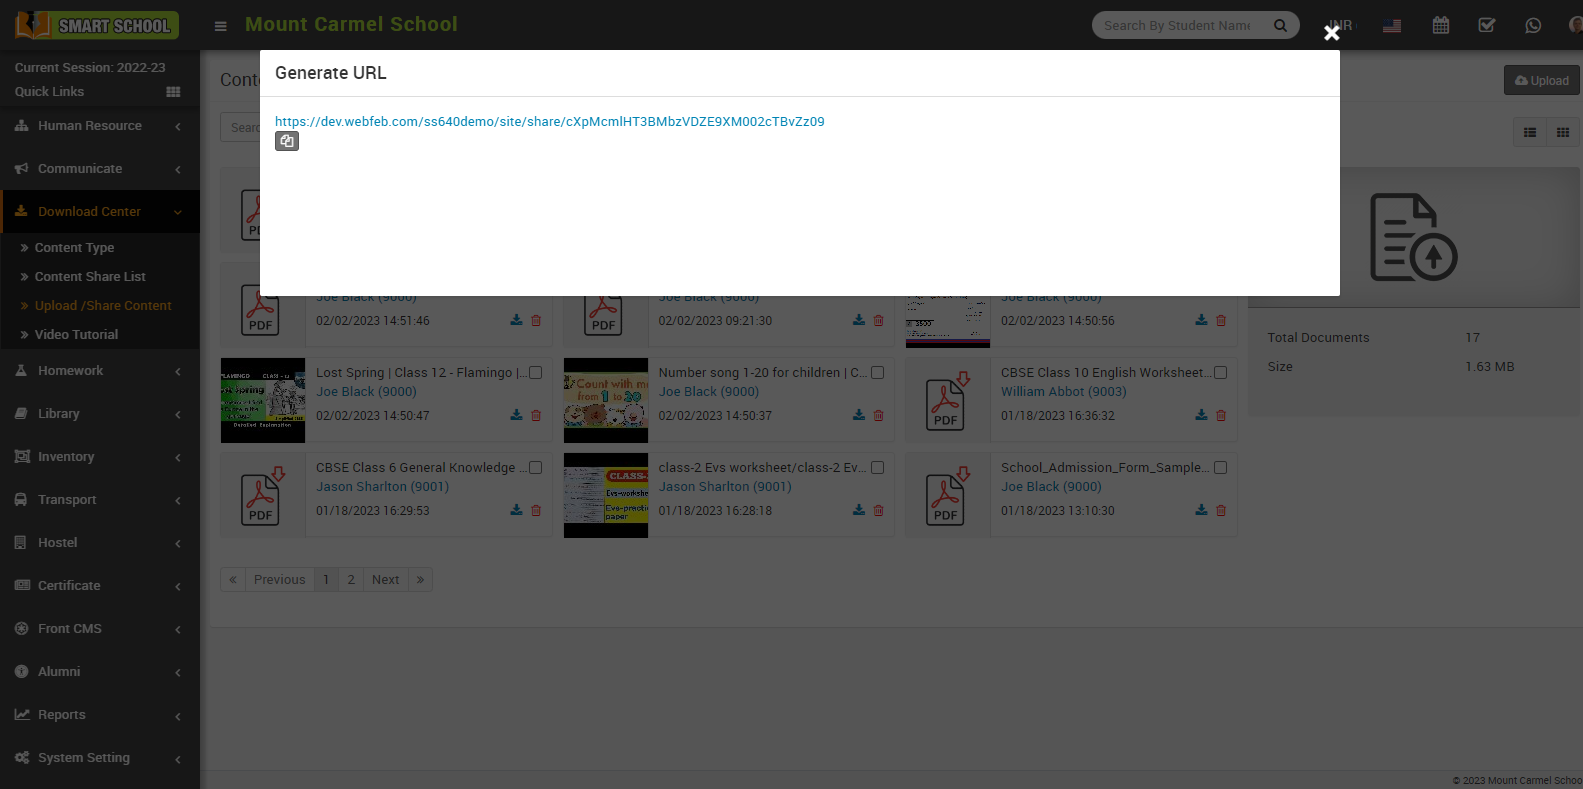
On this page, you can view all the selected content along with their details. To open a content item, simply click on it. If you want to download the content, click on the download icon, and it will be downloaded to your system.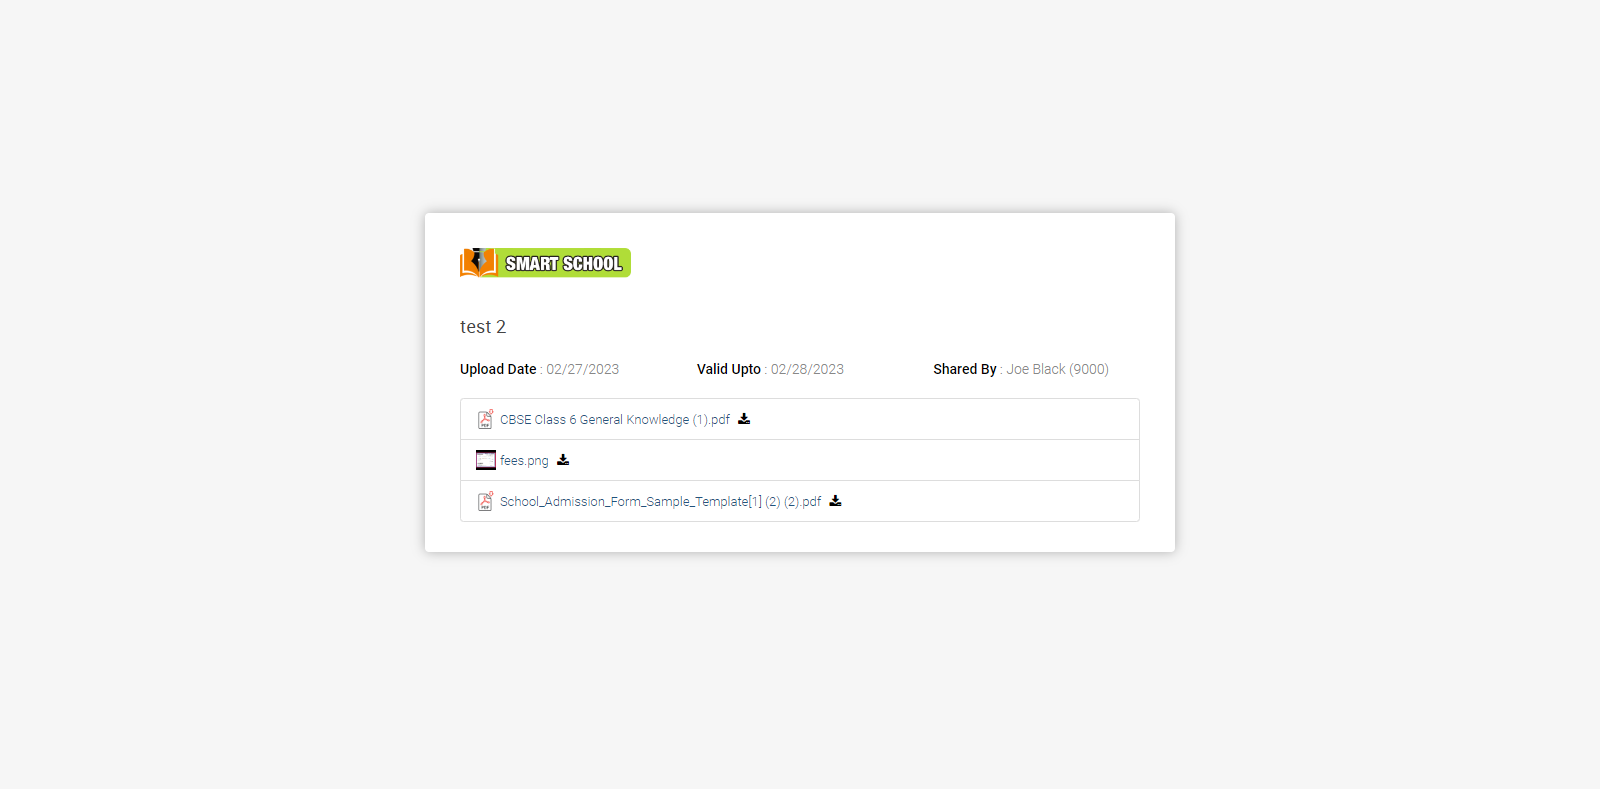
To Delete the single content from the content list, simply click on Delete icon showing in over the content and confirmation model will appear.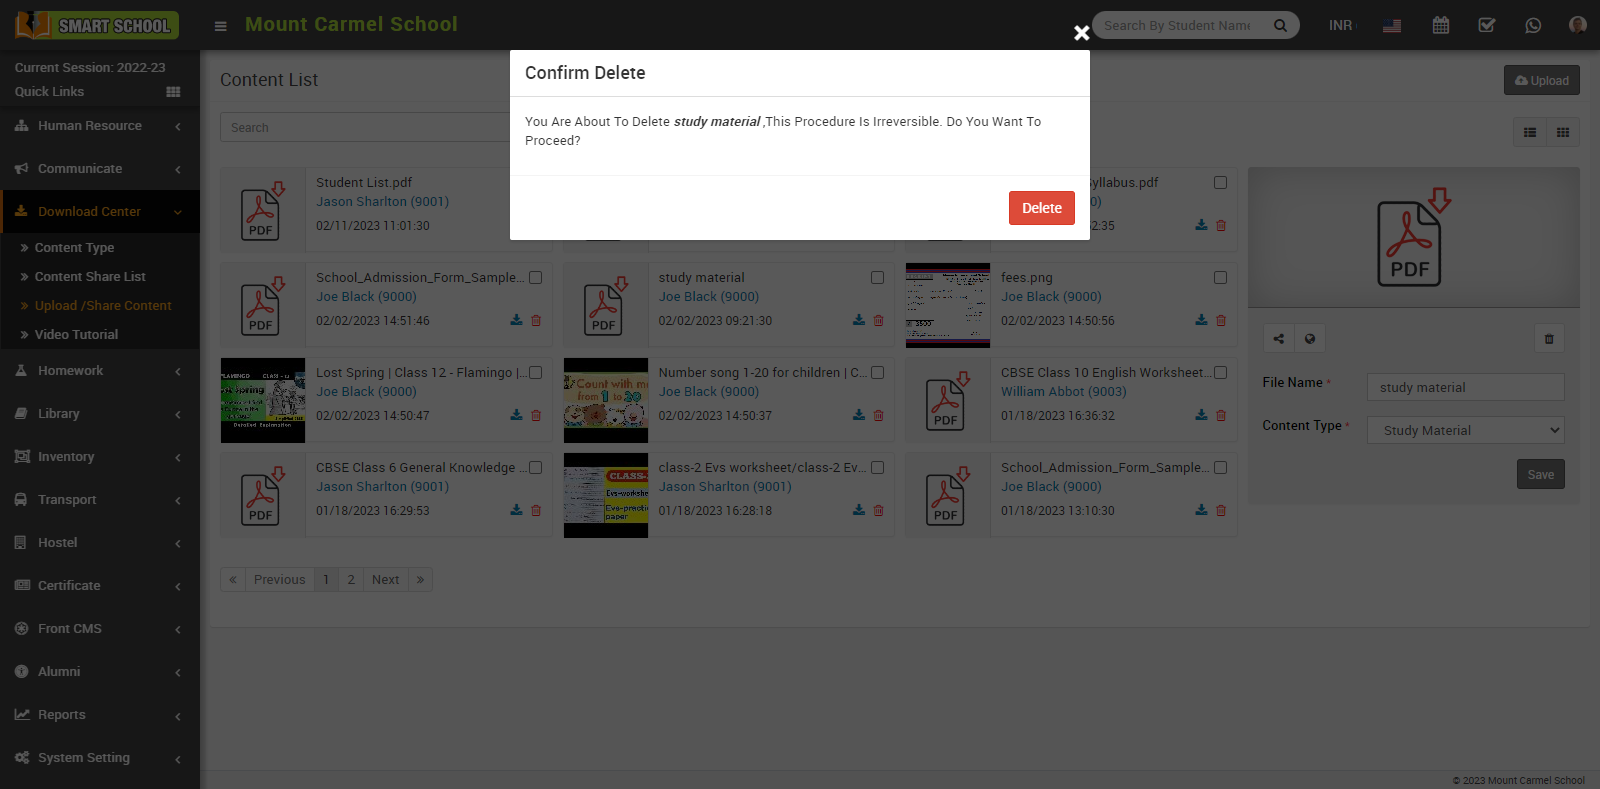
Now click on delete button which is showing in below, content will be delete successfully.
To Delete the multiple content from the content list, first you need to select the multiple content by checking the checkboxes, now click to Delete icon, showing at right of page, Confirmation window will be appear.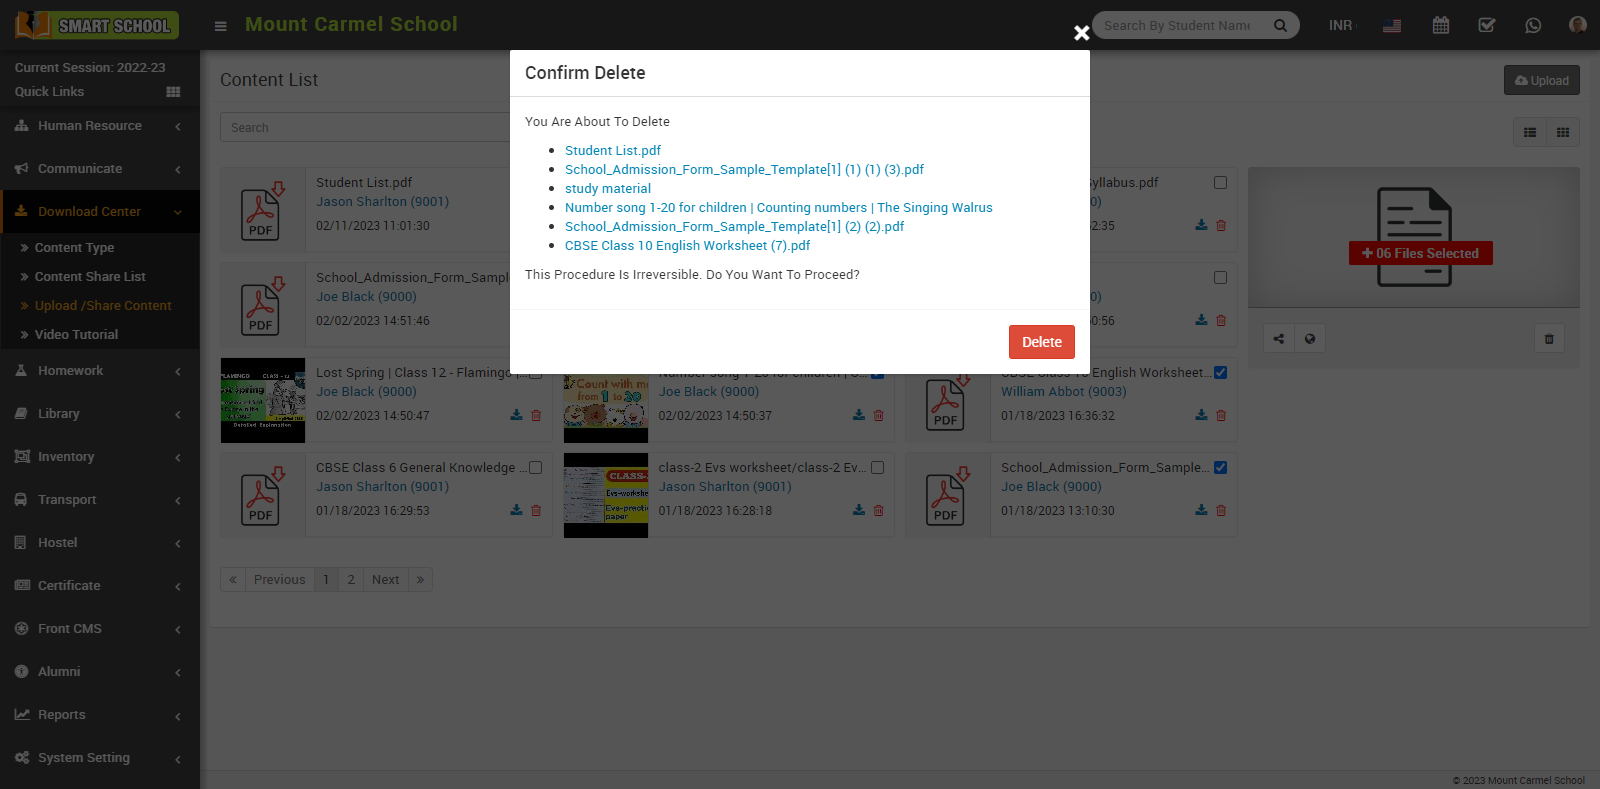
In this Confirmation model, you can see the selected content along with its file name that you want to delete. To delete the content, simply click the Delete button, and your selected content will be deleted successfully.